A quality deck starts with a sturdy, well-built frame. These are some of the key things to keep in mind when building a deck.
Sizing Things Up
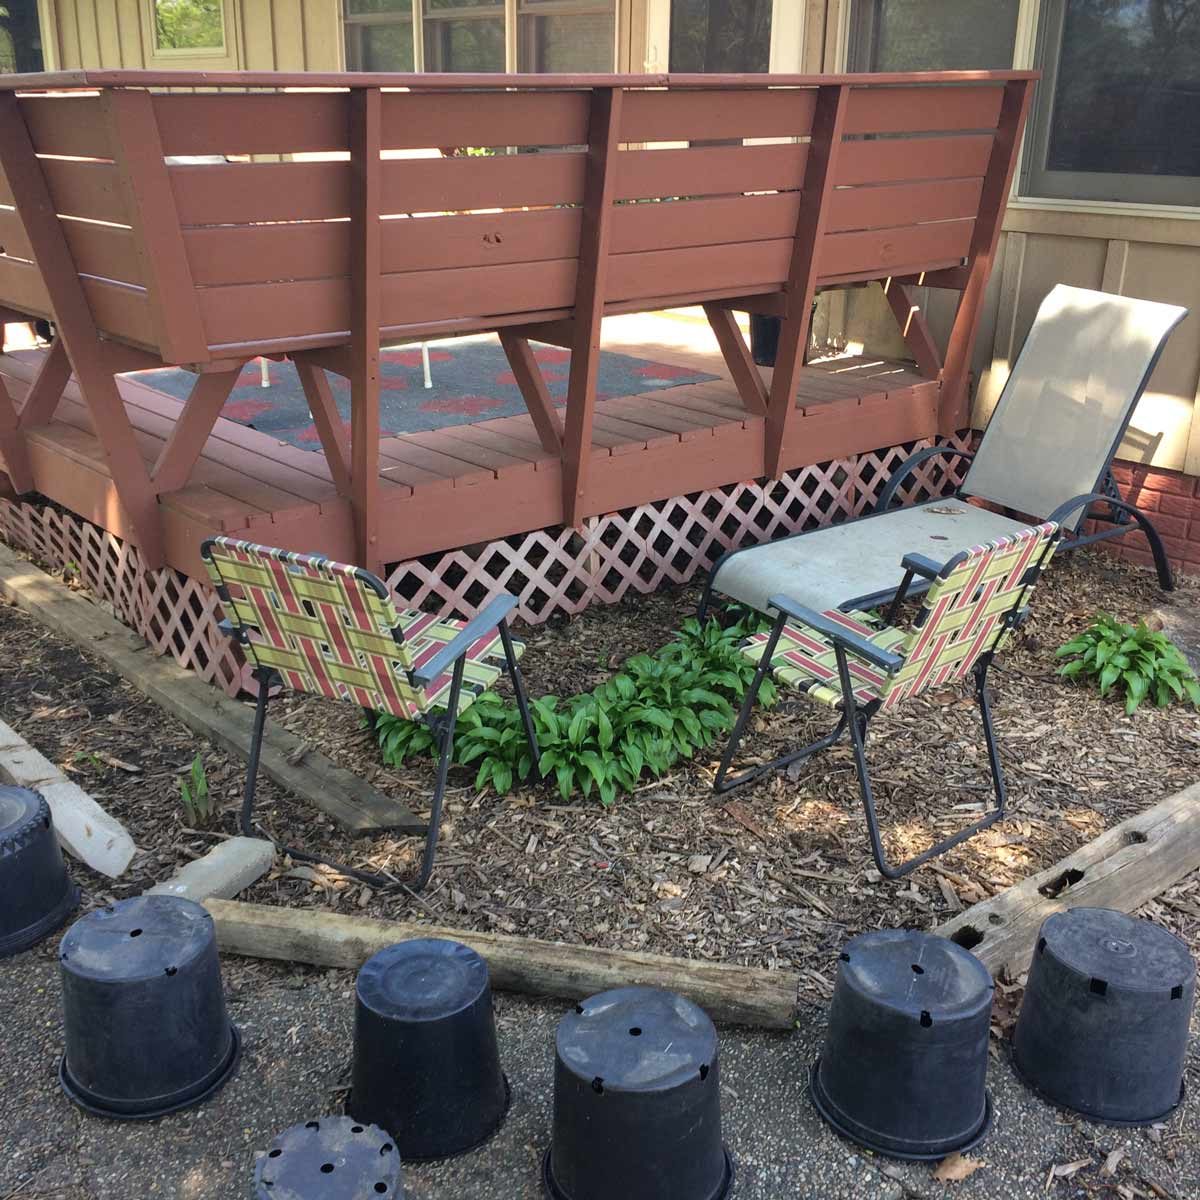
Before we could build a deck, we needed to know what the new deck would look like. We experimented with different shapes and sizes, laying out timbers and setting up chairs to determine whether the new deck would be large enough. Then we set out nursery pots, representing shrubs and perennials, to ensure there was room for a path to the deck.Get some ideas with our DIY deck plans.
Taking Care of Details
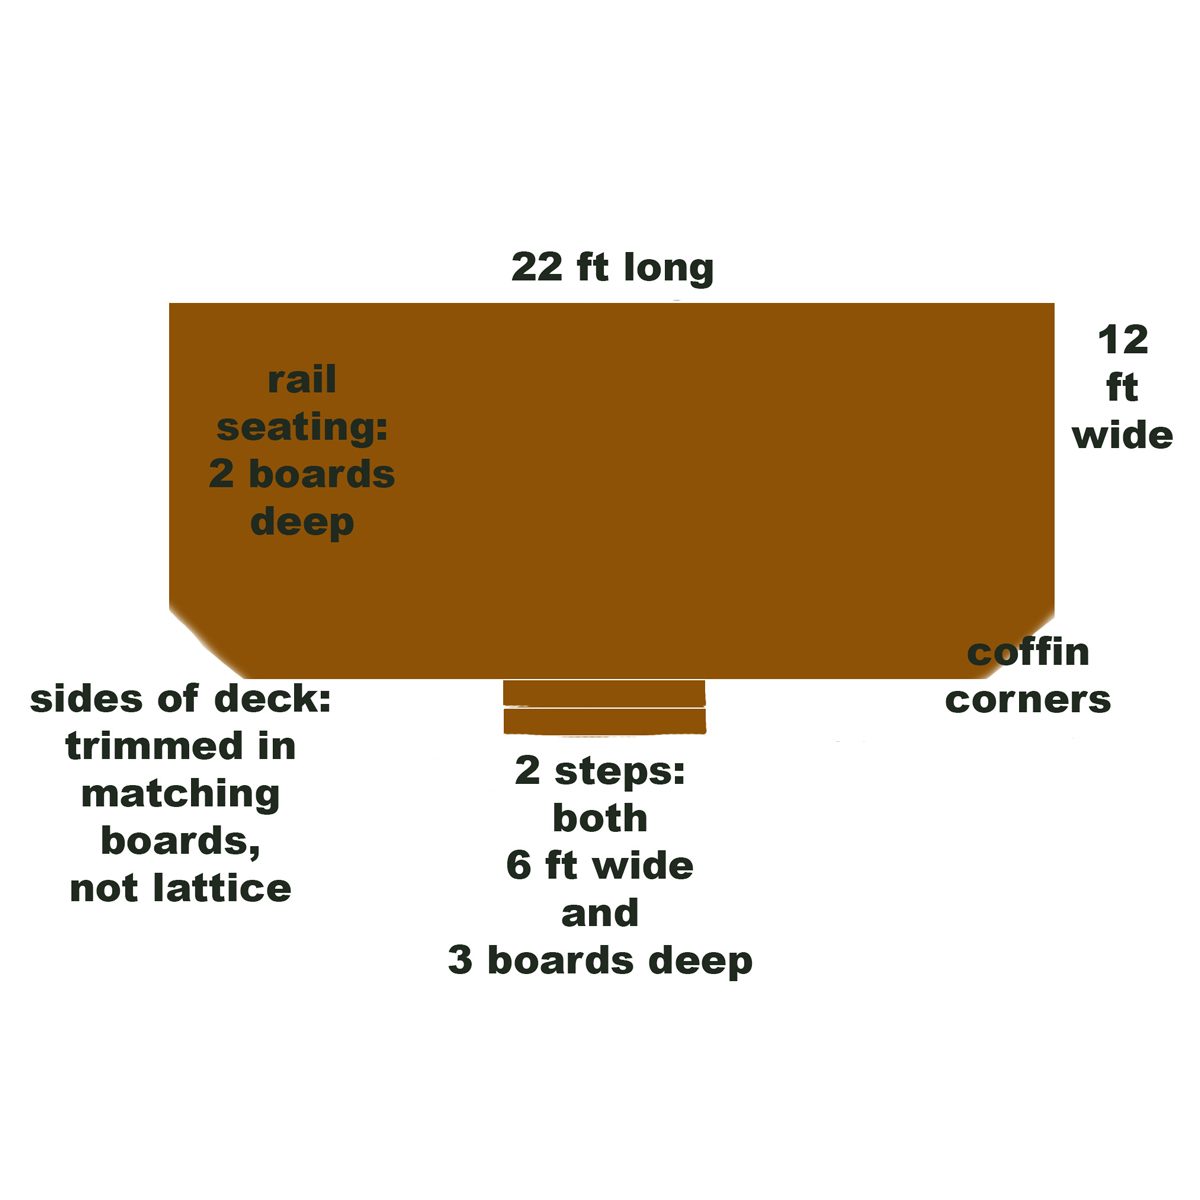
Next up was to sketch out the deck’s dimensions and shape. I did this in Photoshop but could have used SketchUp or done something by hand on grid paper. A sketch like this is often required for a permit, and it certainly comes in handy if you’re working with a builder. Add as many details as you can. I later added the seat rails to this diagram and changed the specs on the steps.
Here are 15 modern deck building tips.
Dig This
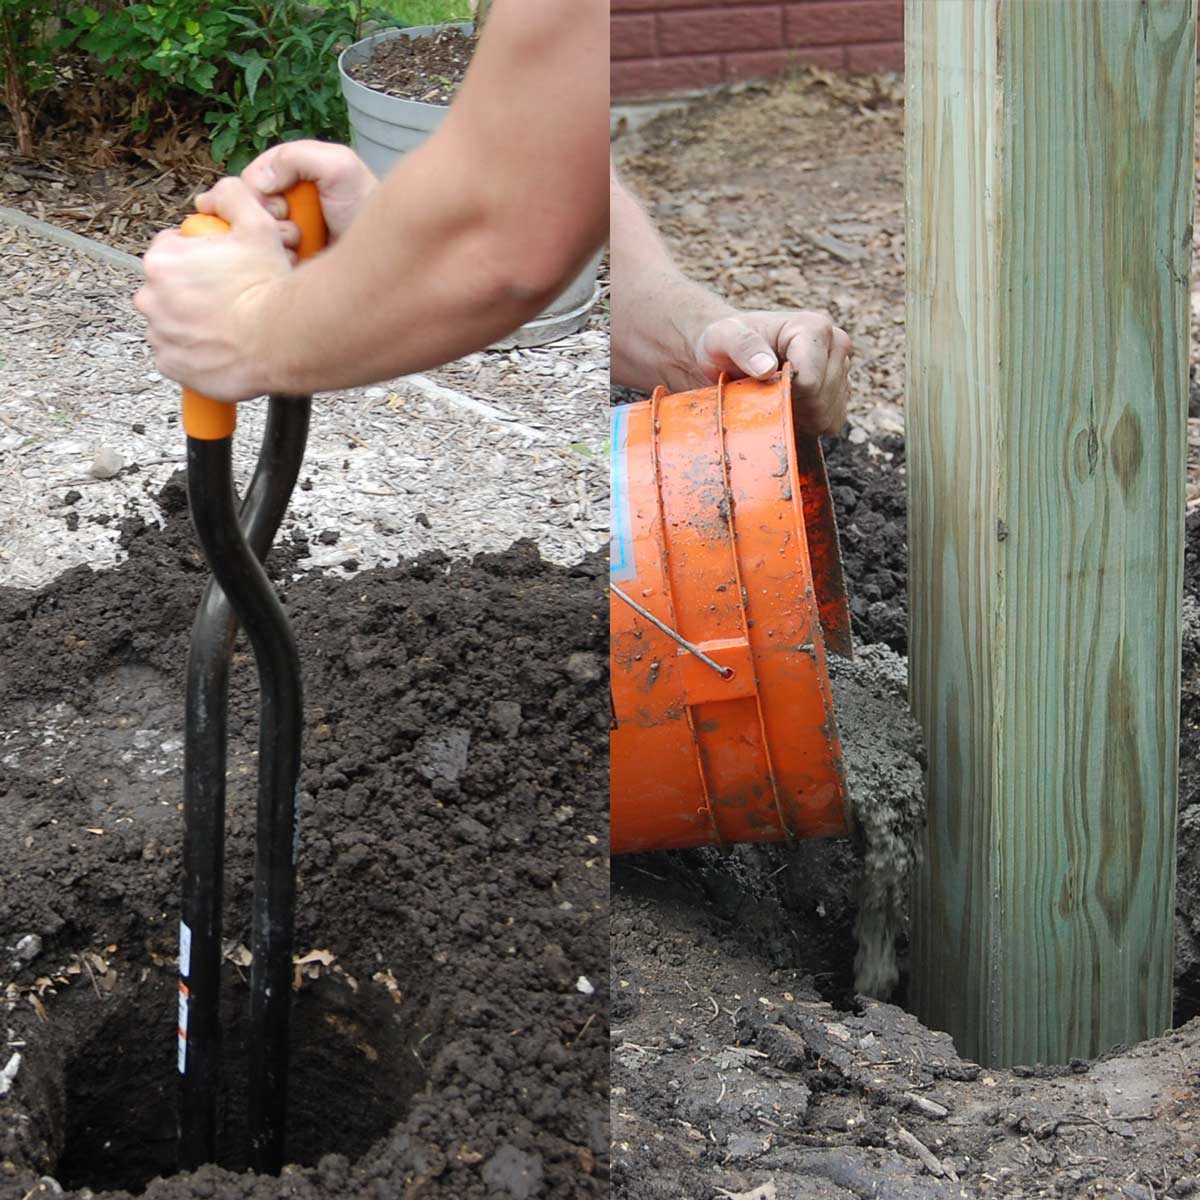
Once the permit was in hand, the old deck removed. Then it was time to install the footings for the new deck. This involved digging holes, lining the hole with gravel, setting posts in place, pouring the concrete footers, and leveling the posts.
Learn more about footings here.
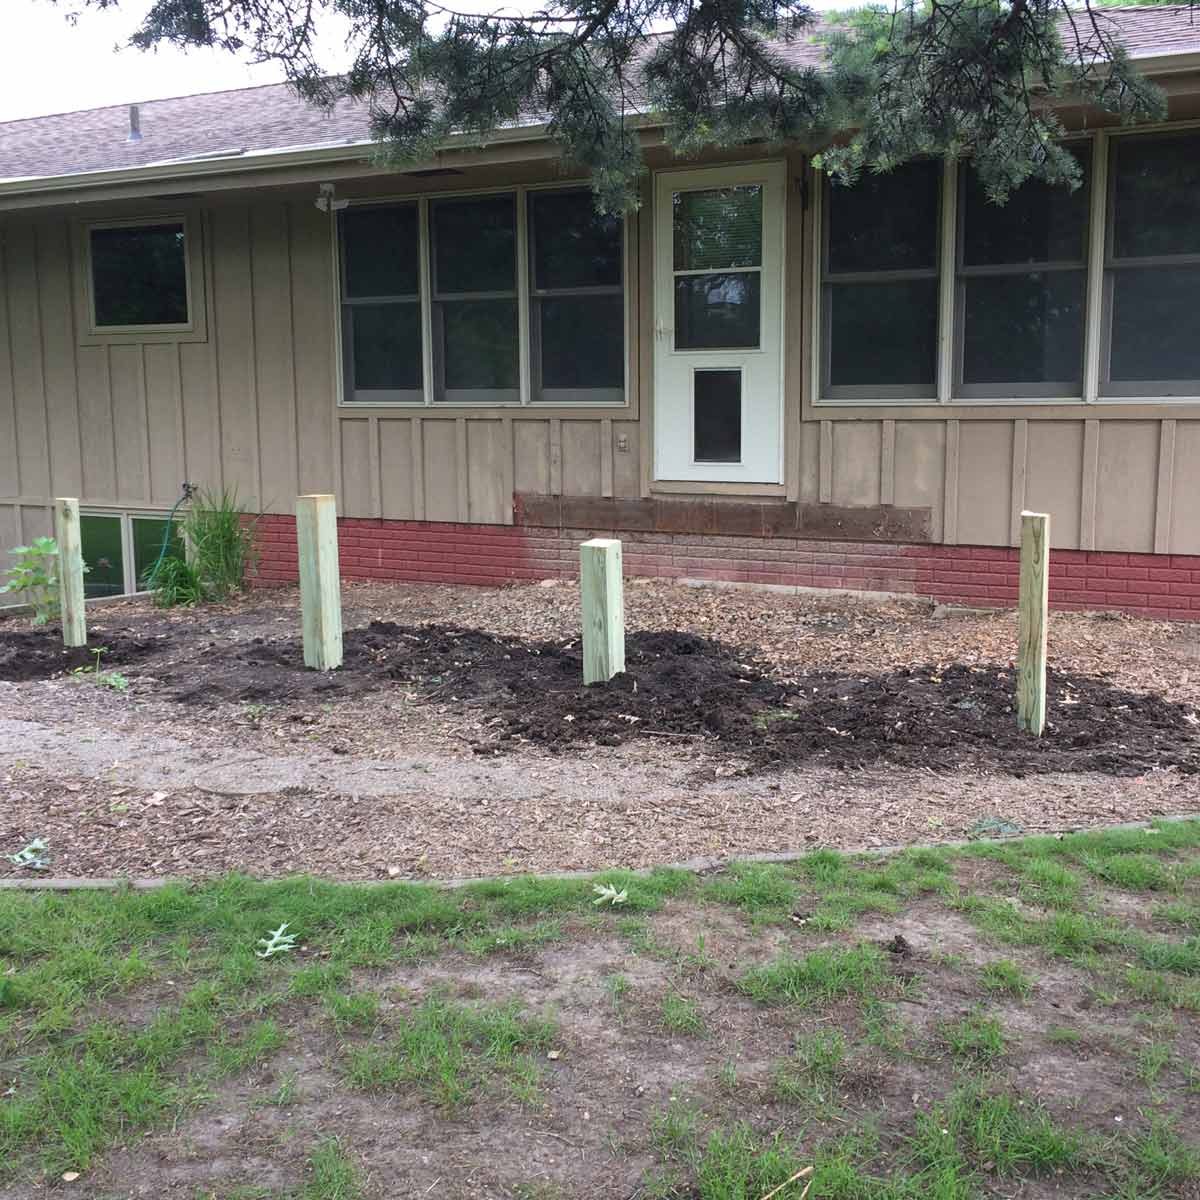
The Long and the Short of It
It’s a good idea to use longer posts than you need. You can cut them to size later, after the concrete has set.See how to make perfect deck posts.
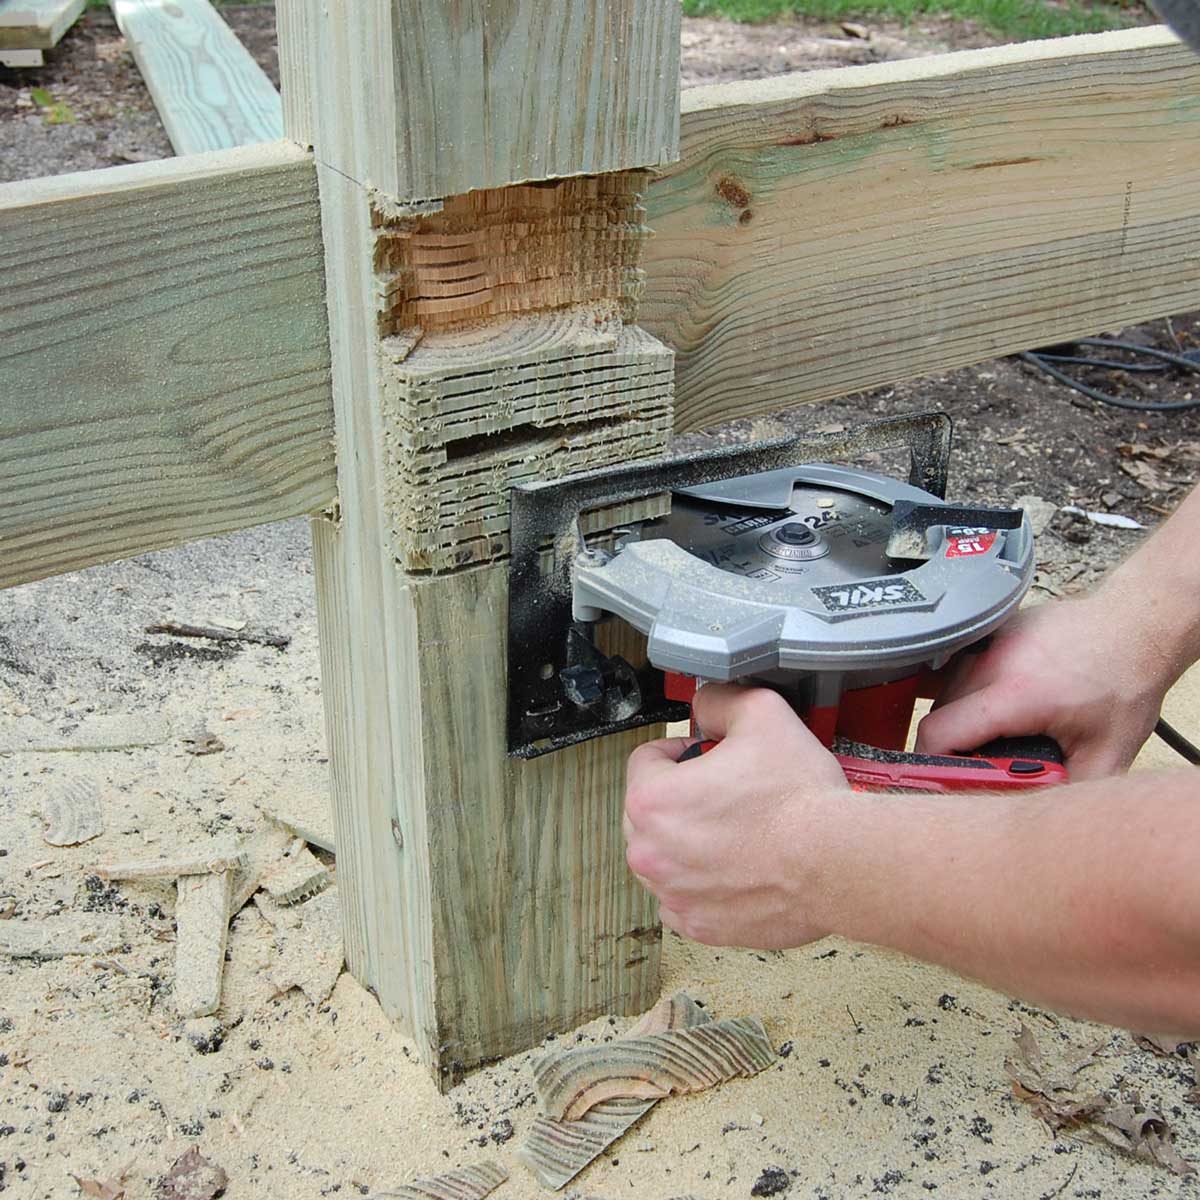
In the Groove
To attach beams to post footings, it’s helpful to create notches so beams can nestle in the posts. This means cutting grooves into the posts, then chiseling out debris to create a clean notch.

Check the Ledger
As we noticed when tearing out the old deck, a ledger nailed to a house is a ledger improperly installed. With the new frame, we made sure to attach the ledger to the house with bolts and a socket wrench rather than nails and a hammer.
Learn how to properly attach a ledger.
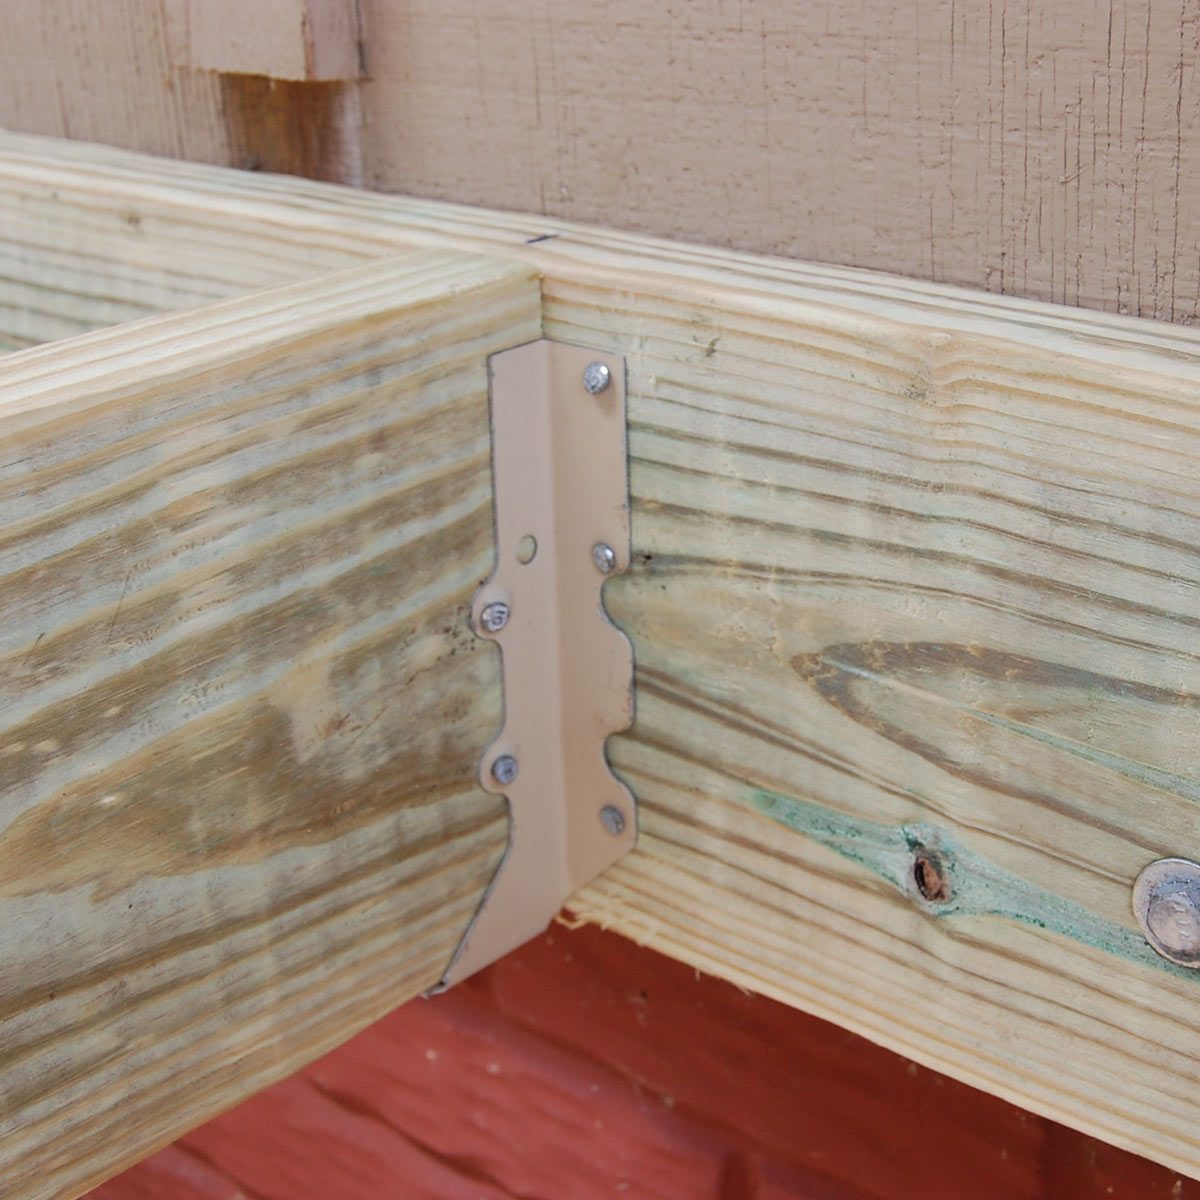
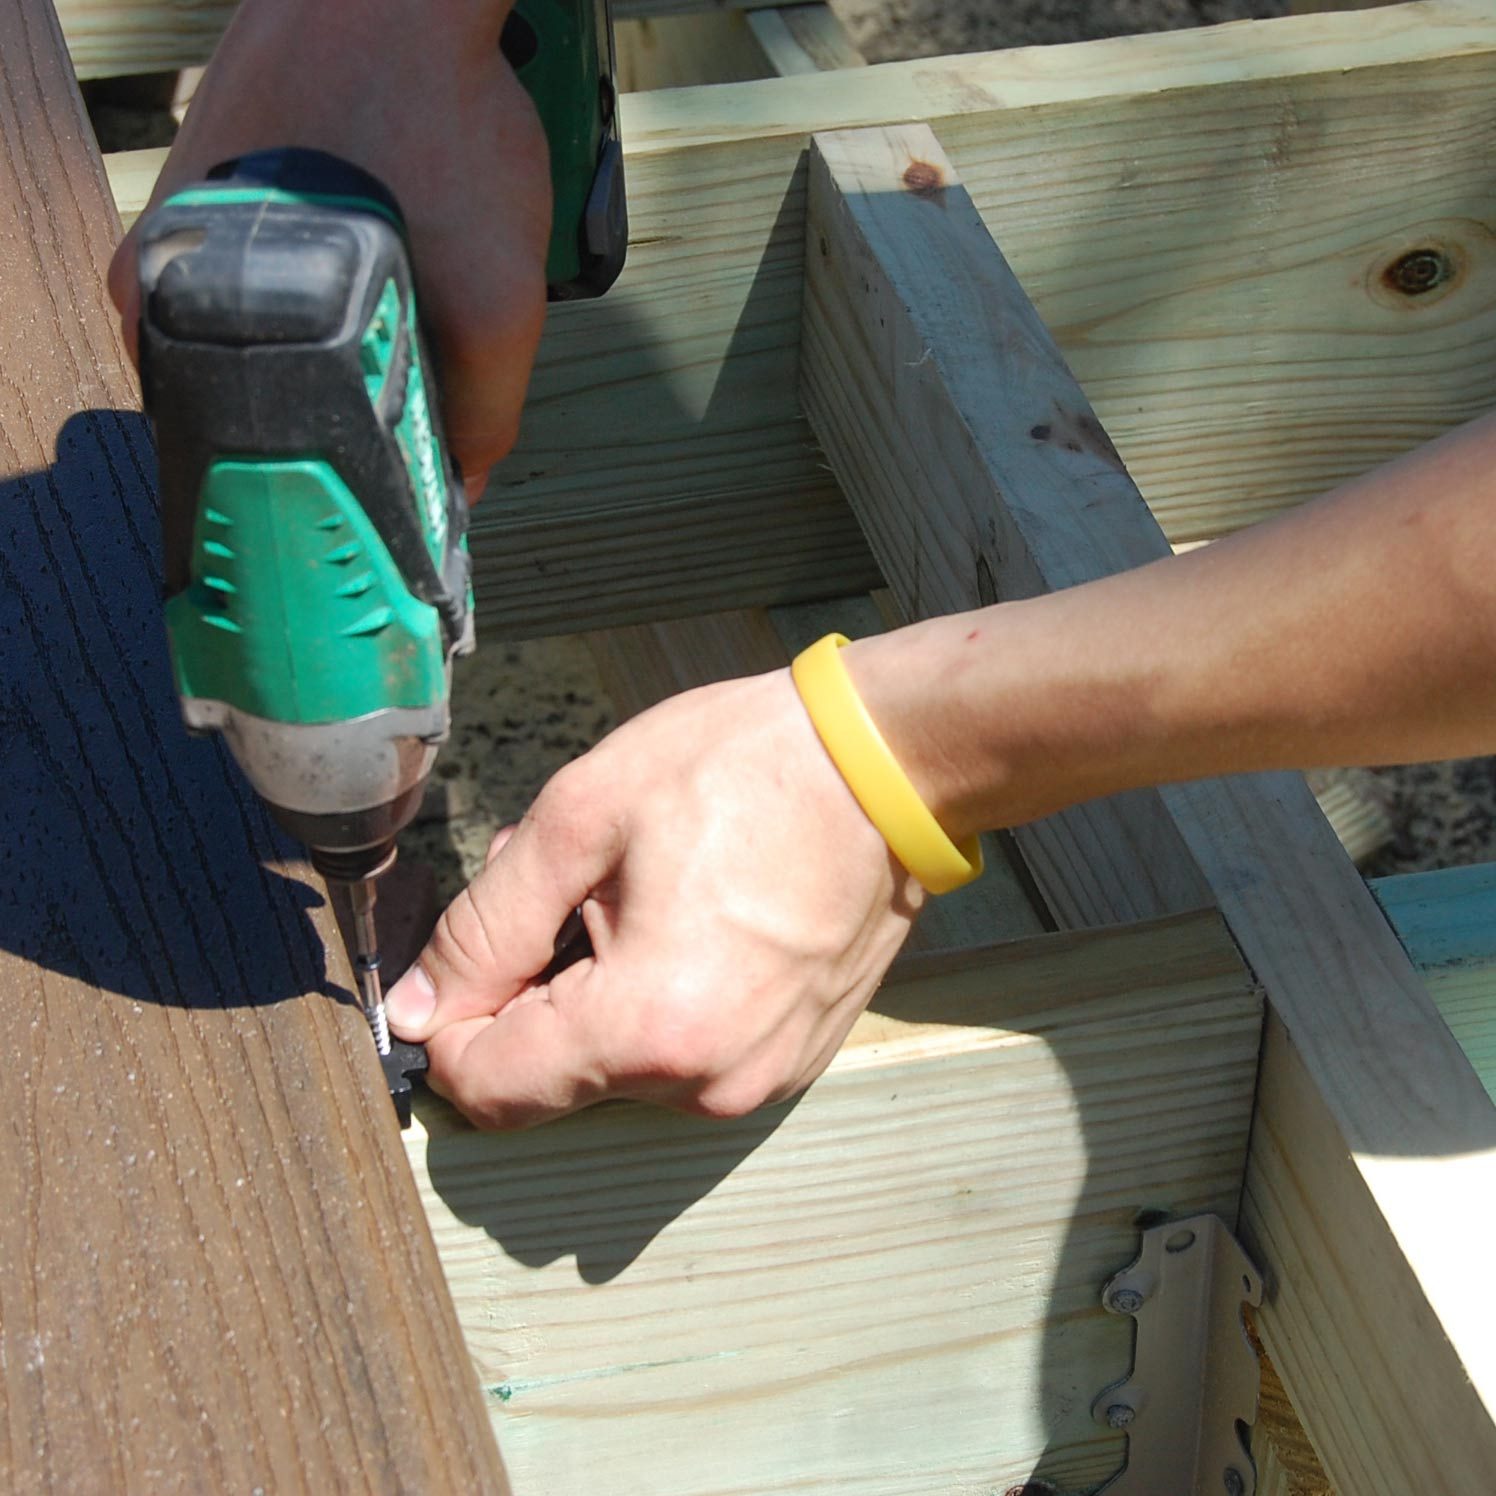
Joist to the World
Once the ledger was secured to the house, the joists were attached to the ledger board with joist hangers and special galvanized joist hanger nails.
See how to install joist hangers.
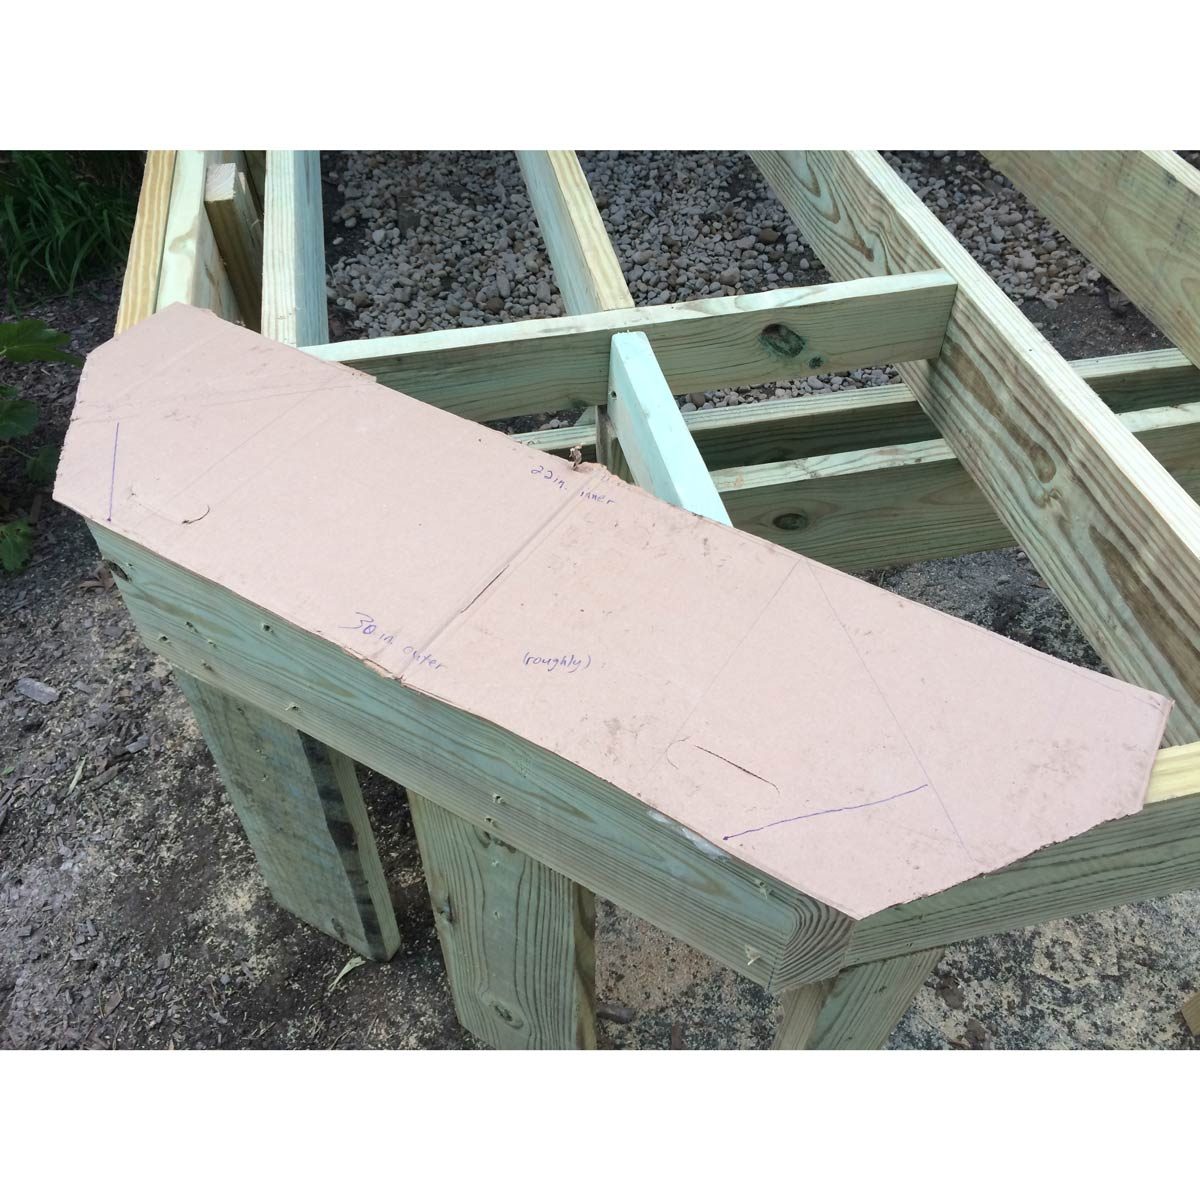
Hitting the Coffin Corner
Not wanting to leave anything to chance, we created a template for the builder to use when making the coffin corners on the deck. This way we knew there would be no Goldilocks syndrome—the length and width would be just right, not too small, not too large.
Check out these 14 measuring tips and techniques for DIYers.
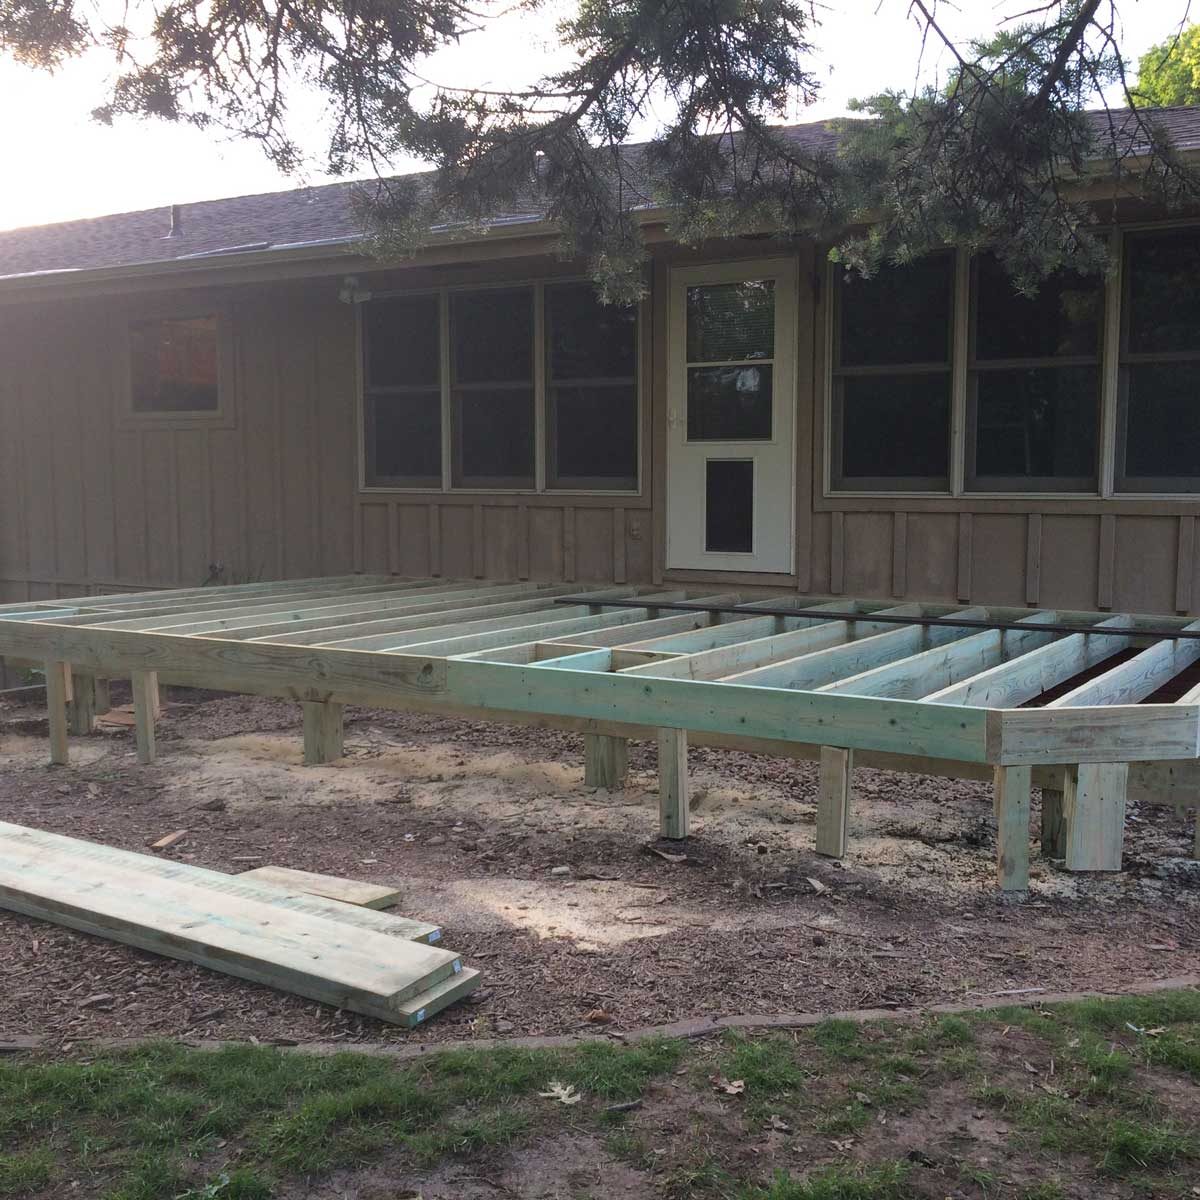
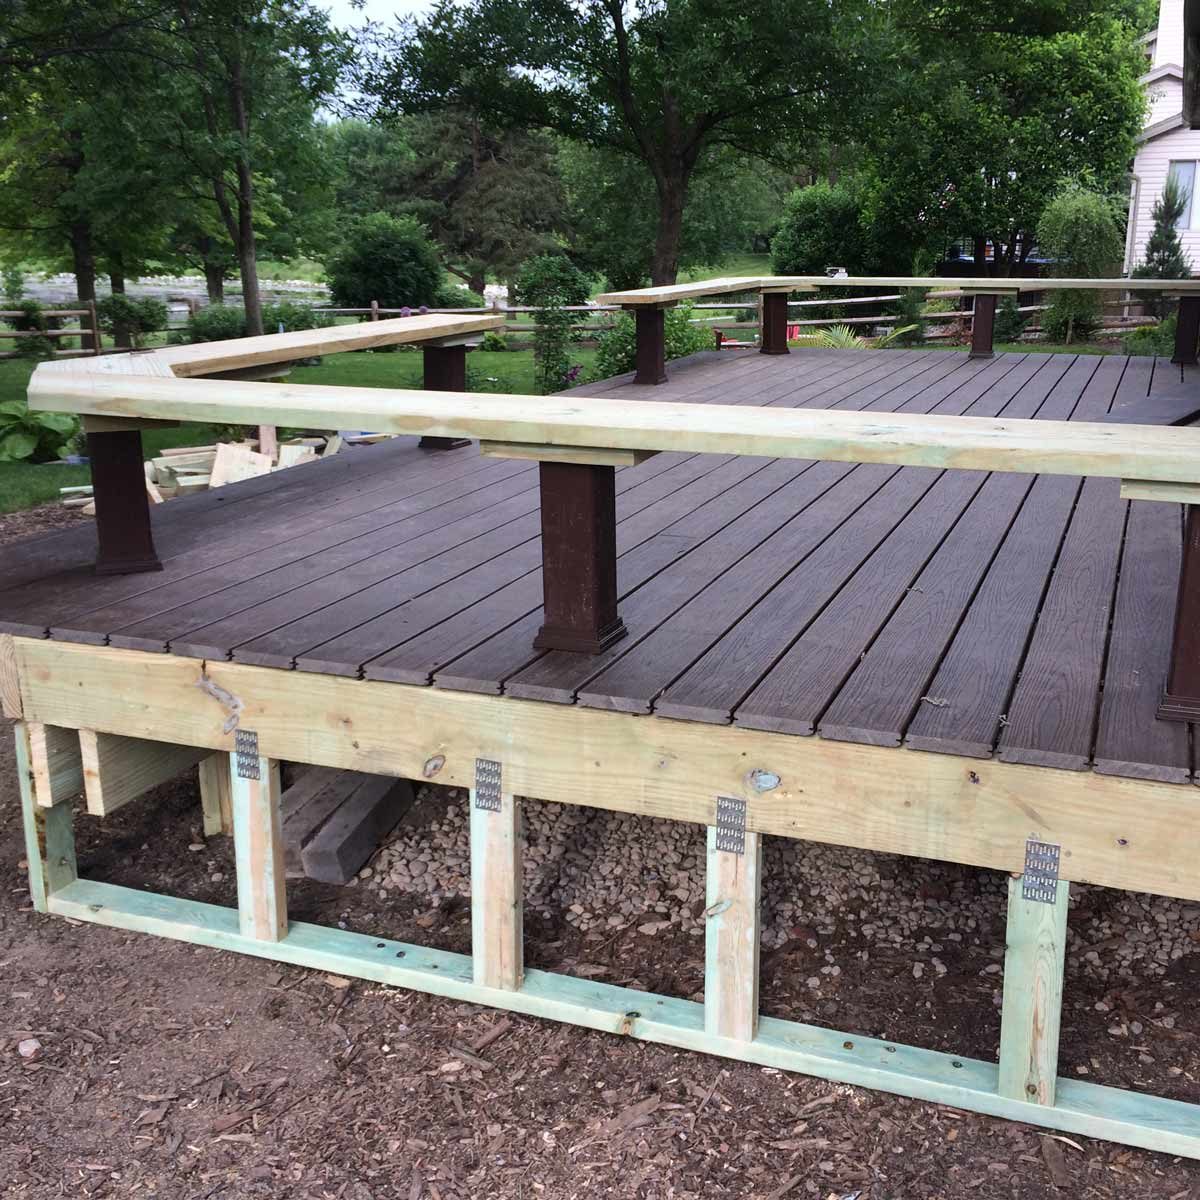
A Complete Frame-Up
Once the framing was complete, we could really visualize the size of the deck and start to get a feel for where the landscaping and path would go. Trex was next!Plus: Here’s a tip for preventing deck joist rot.
Spiced Rum on Tap
We chose Trex composite decking because it’s durable, long-lasting, and won’t check or need staining. The color of the decking, Spiced Rum, really looks like natural wood. It also goes well with the siding and roof of our house. Trex decking is attached with hidden fasteners—no nails or screws to step on with your bare feet—and this hidden fastening system ensures that the gaps between boards are automatically uniform.
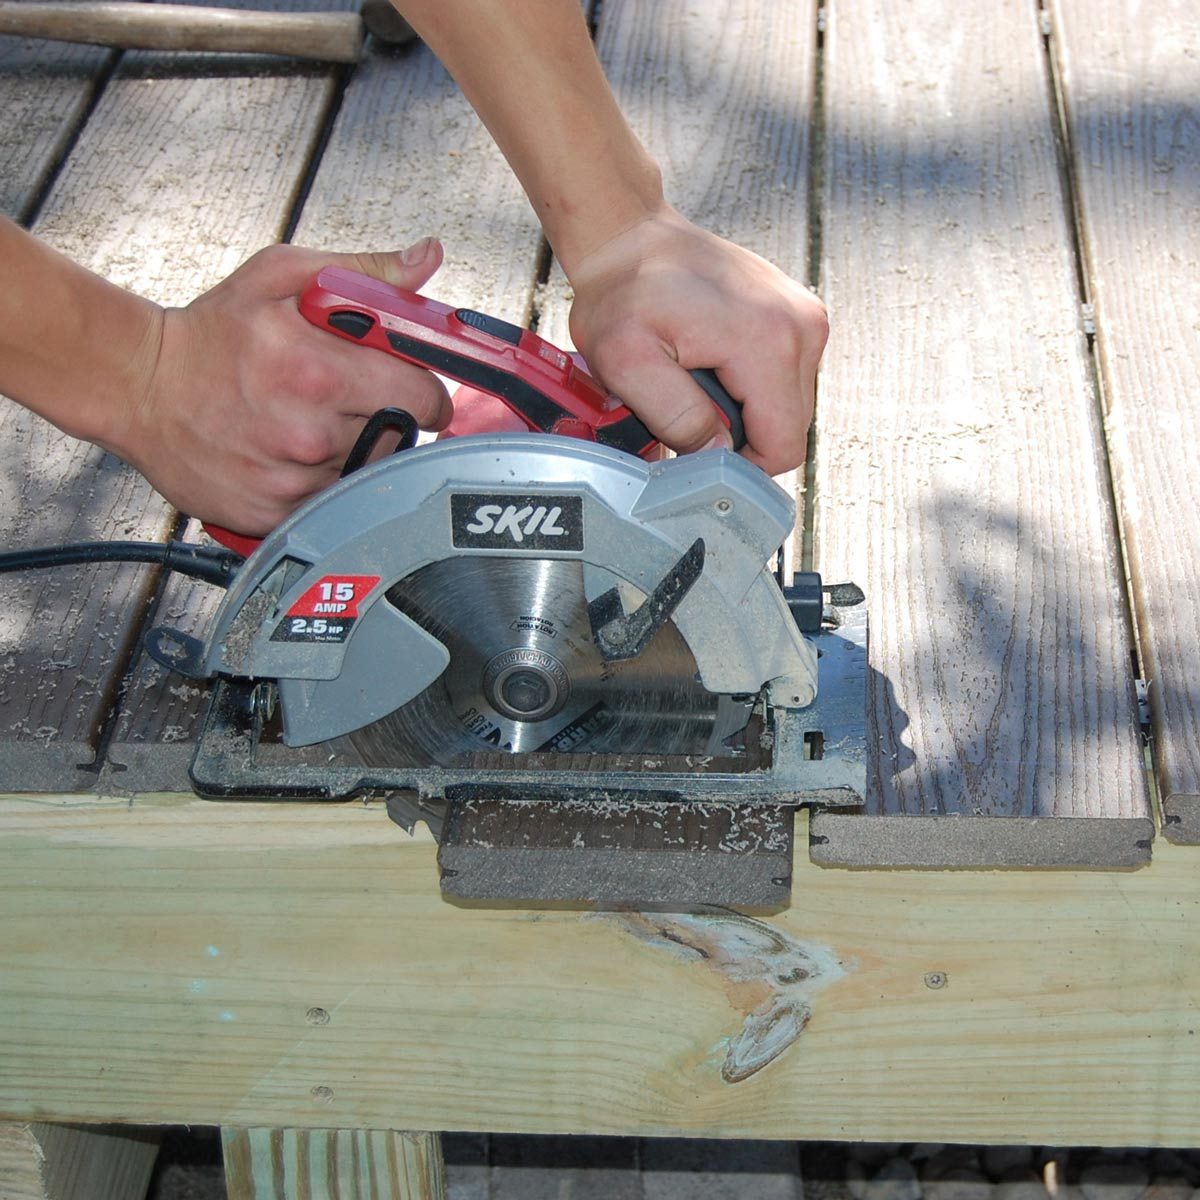
A Cut Above the Rest
Working with Trex composite decking is as easy as working with wood. Once the boards are secured, use a chalk line to mark the edges, then cut off the excess material with a circular saw.See our complete Trex decking installation guide.
Looking Sideways
Our plan was to run fascia boards horizontally along the sides of the deck rather than the typical combination fascia and lattice. This looks richer and more substantial, in my opinion, but it did necessitate a little extra framing at the base to support the lower fascia boards.
Learn more about fascia boards and the range of colors available from Trex.
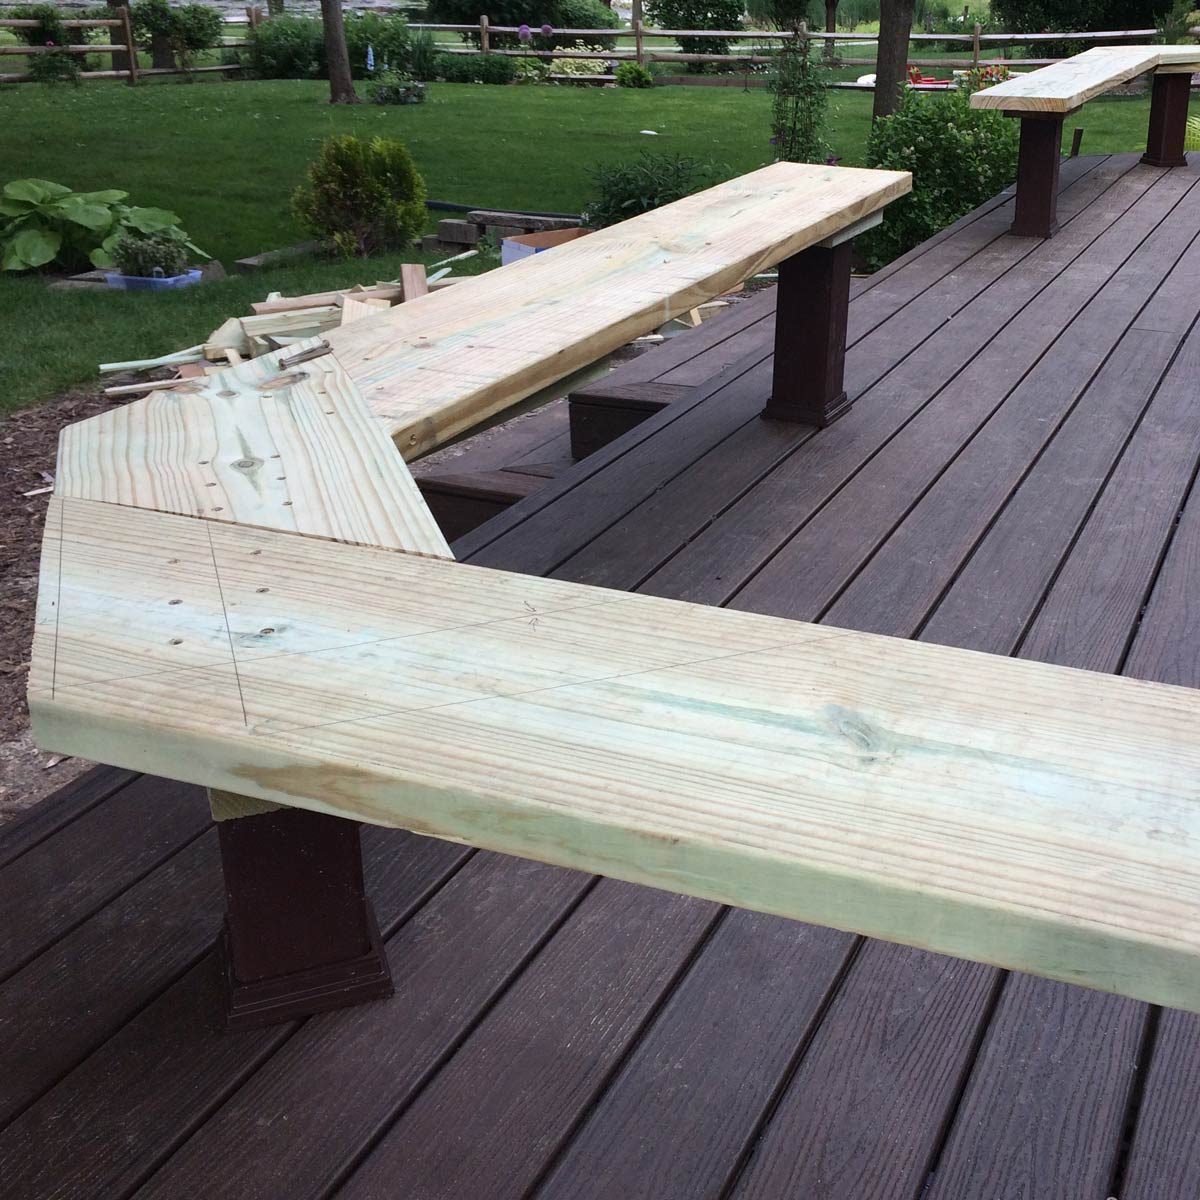
Off the Bench
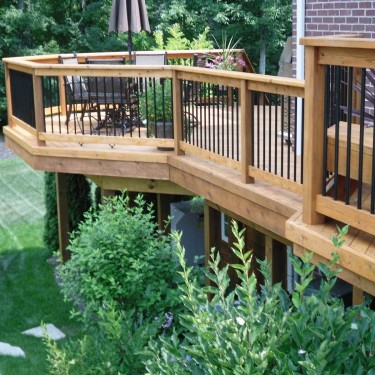
Rather than standard railing, which would block the view, we opted for built-in benches. The benches were framed in pressure-treated wood attached securely to posts.
Here’s another deck with built-in benches.
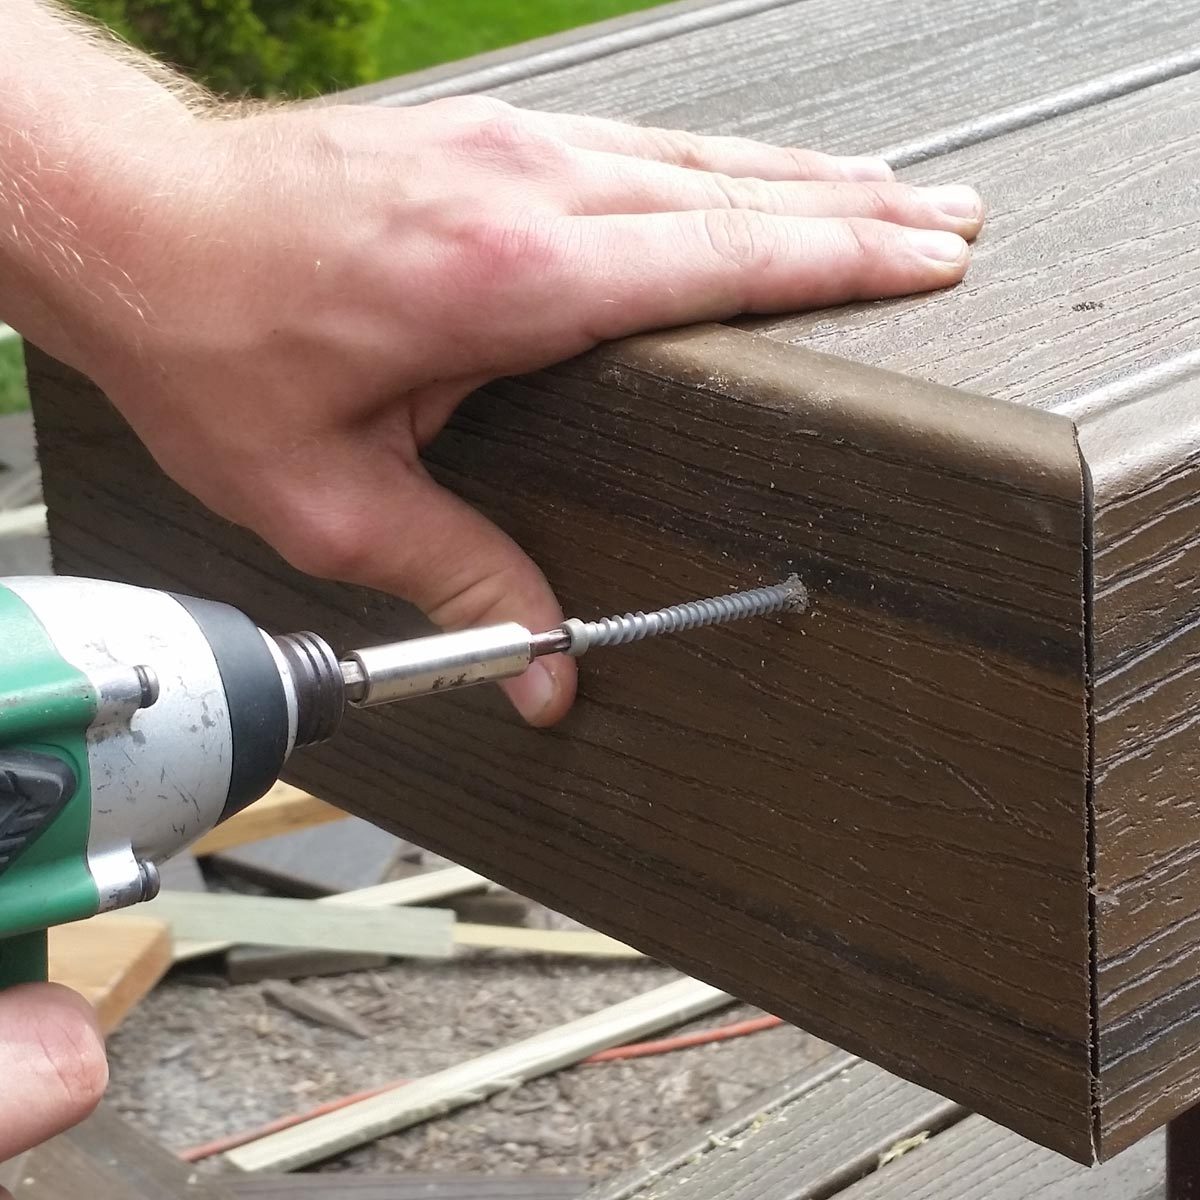
Capping It Off
Trex boards were cut and mitered and attached to the wooden frame, then post caps were installed so no bare wood showed. The deck was finally finished.
Check out these deck add-ons that are super-cool!