Save yourself some time and hassle during your next woodworking project with one (or 41!) of these genius sanding tips from editors and readers of The Family Handyman.

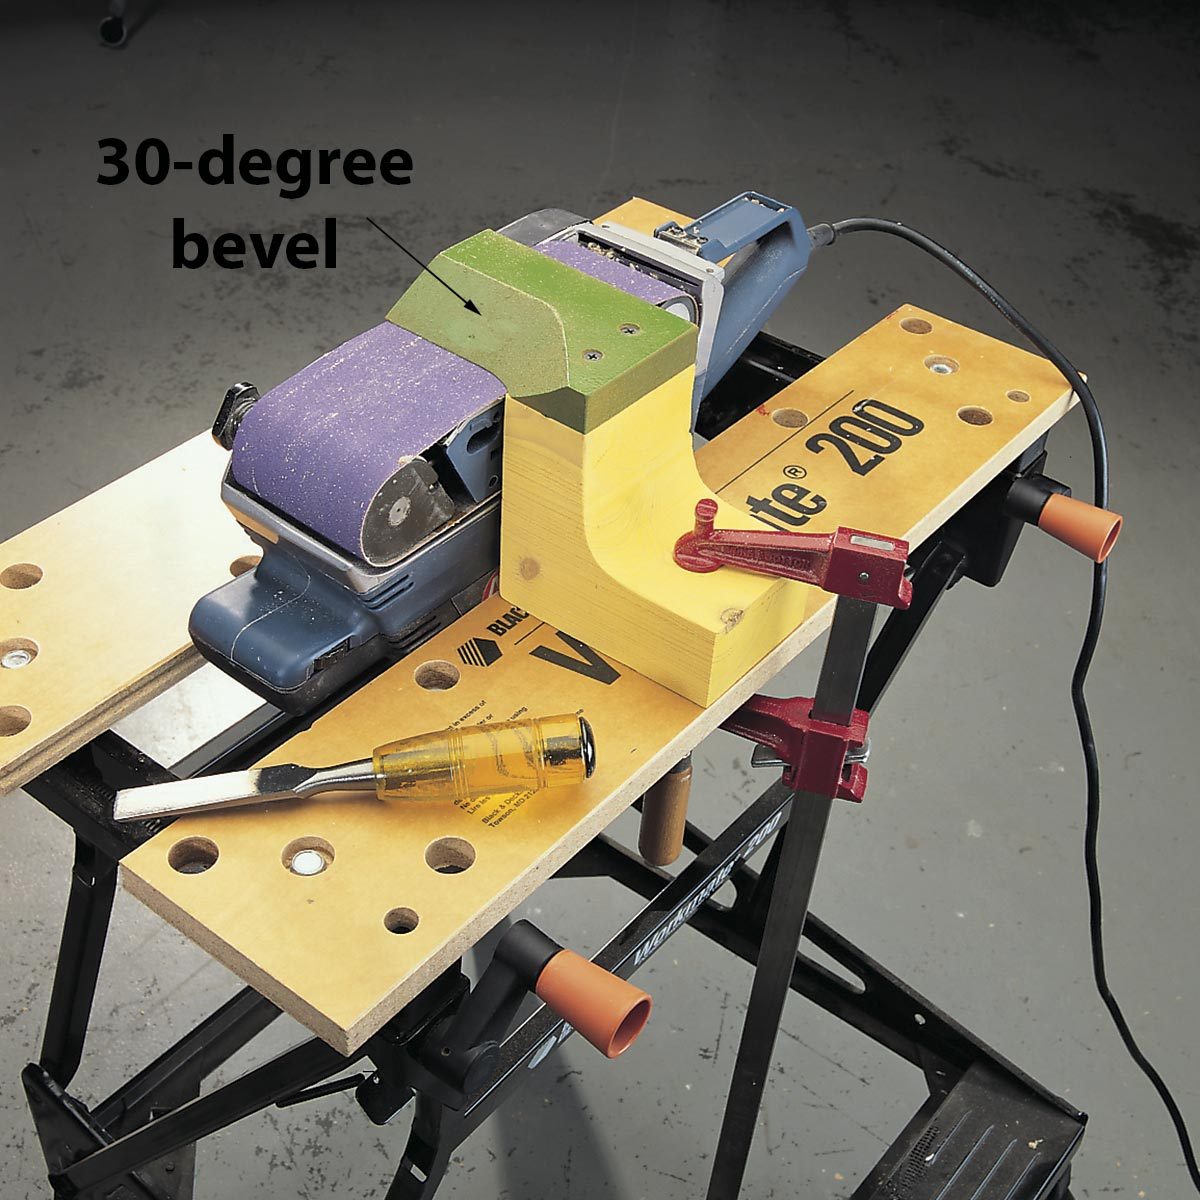
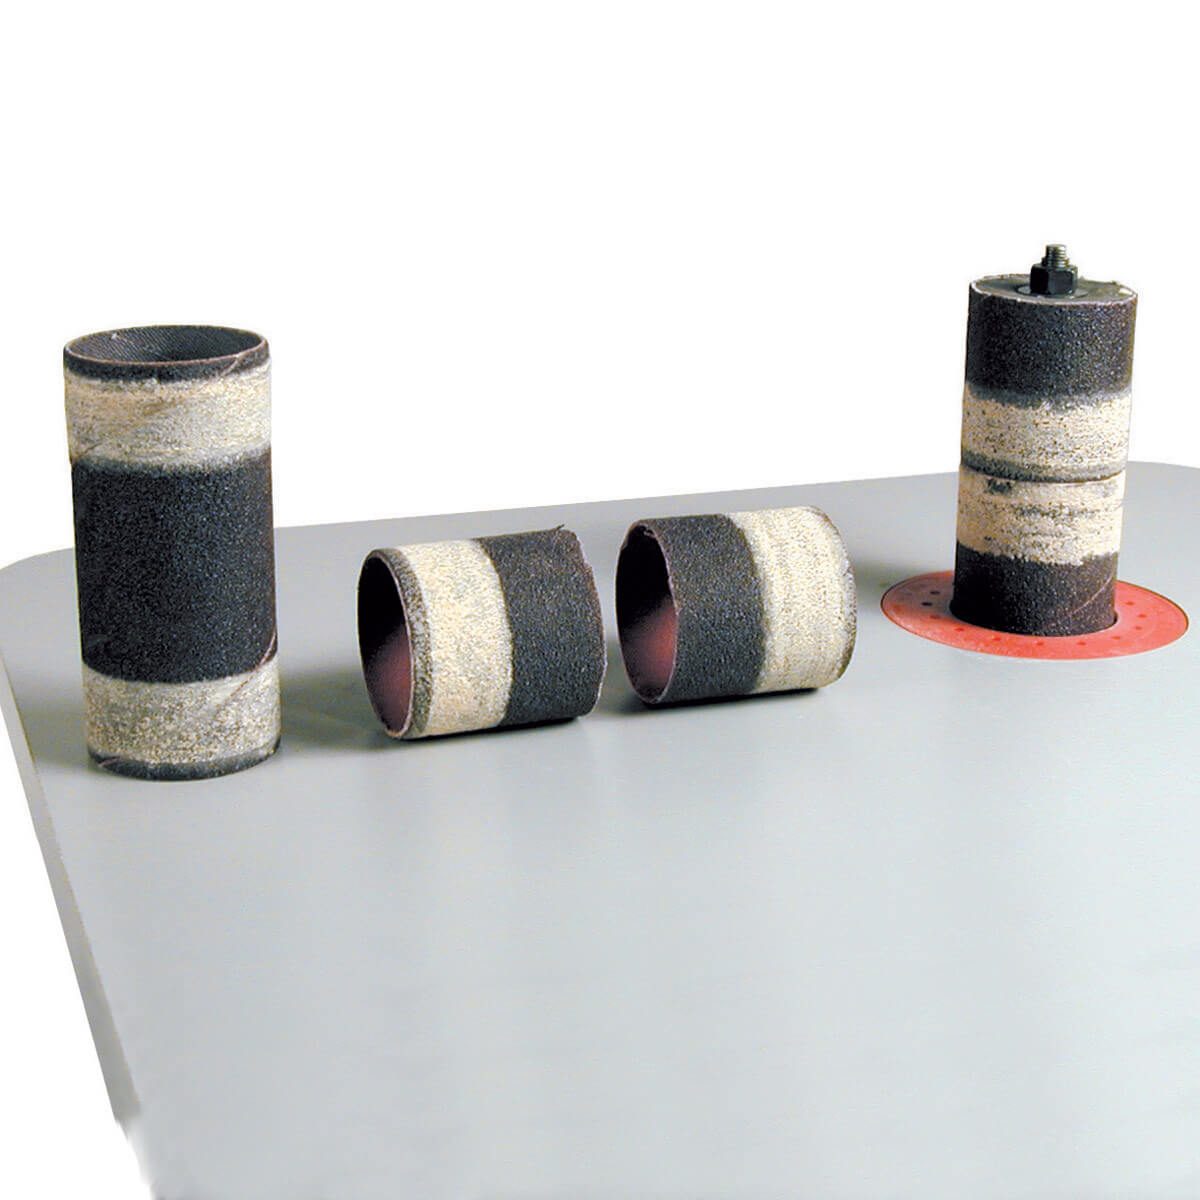
Drum Sanding Jig
This easy-to-build jig transforms an electric drill into a stationary edge sander for inside curves on all kinds of projects. To build one, you need scrap 3/4-in. plywood, a short 2×4, a 3/8-in.-diameter U-bolt to fit around your drill and two 3/8- in. wing nuts. Housing design and chuck length vary from drill to drill, so we won’t list exact dimensions. Use the steps found here as a general guide for building a jig that fits your drill.
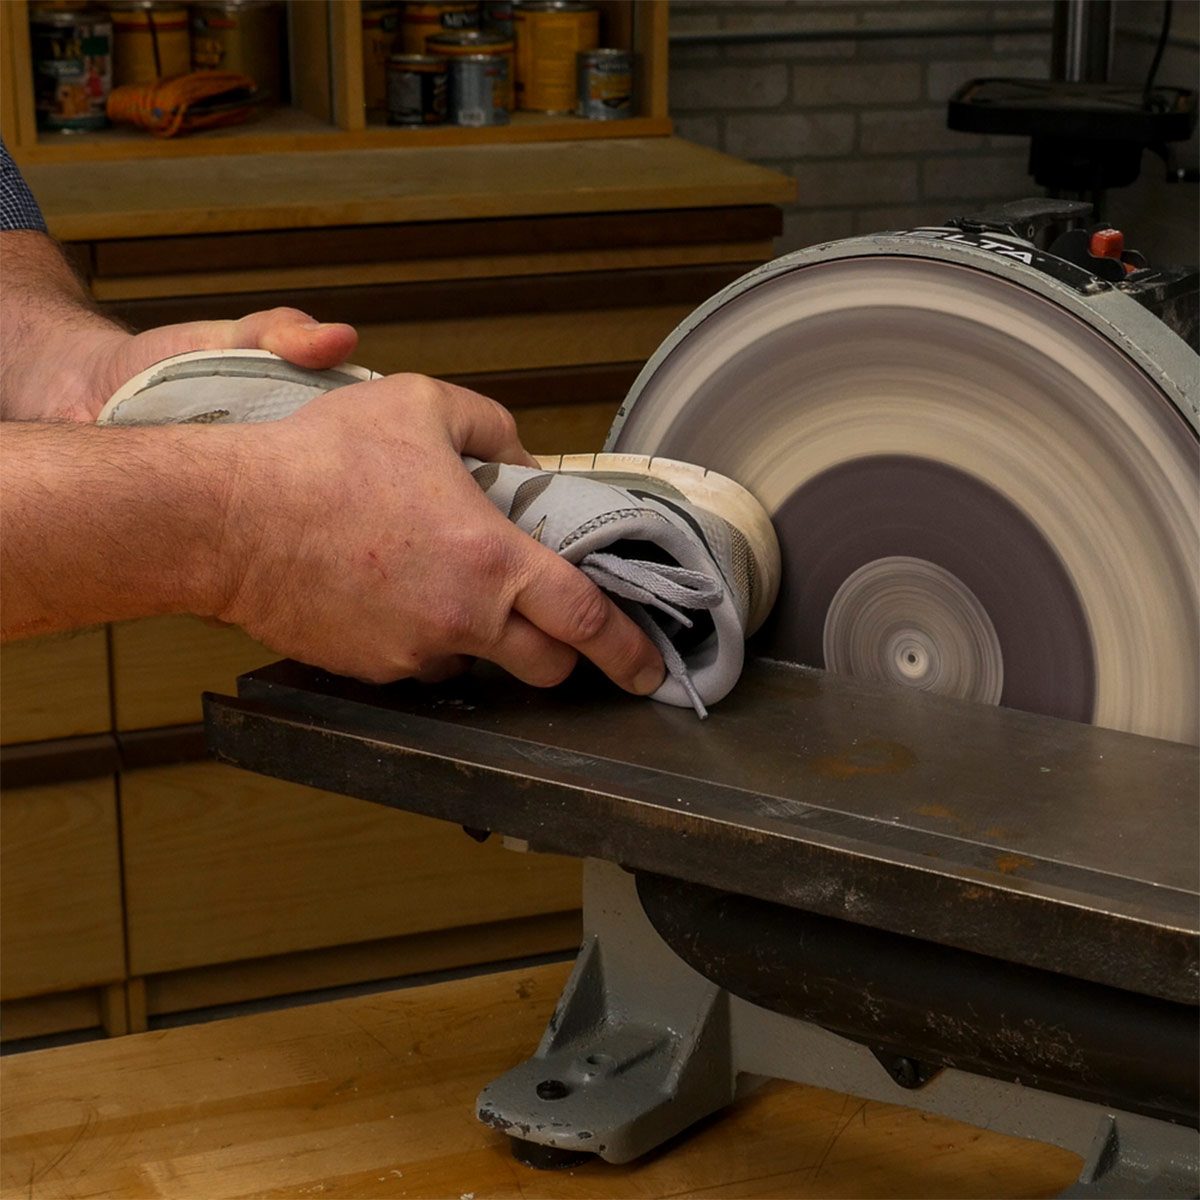
Use a Sneaker to Clean Sandpaper
Make sandpaper nearly new again with a lowly old sneaker. Start up your power sander and dust collection system (remember to wear hearing and eye protection). Then slowly press the rubber sole of an old sneaker along the sandpaper—you'll see a difference instantly!
Dust-Off Softener Sheets
You can see much more clearly when you’re sawing and sanding if you first rub your plastic safety glasses and face shields with a used fabric softener sheet. The exact physics is a matter of discussion, but this makes wood dust a lot less clingy. The key is to use a sheet that’s beenthrough a drying cycle. It’ll be gentler and less laden with softener. Thanks to Travis Larson for this demystifying tip.
Check out 20 more brainy ways to use dryer sheets around the house.
Shop Vac Dust Collection
Turn your shop vac into a versatile dust-collection system for your home workshop.

Quick Woodworking File
This woodworking file comes in handy for sanding in tight spaces. Cut a piece of sandpaper to fit around a paint stir stick. Then use spray adhesive or an all-purpose glue to adhere it to the stick. Write the sandpaper grit on the handle of the stir stick, if you plan to store it for later use.
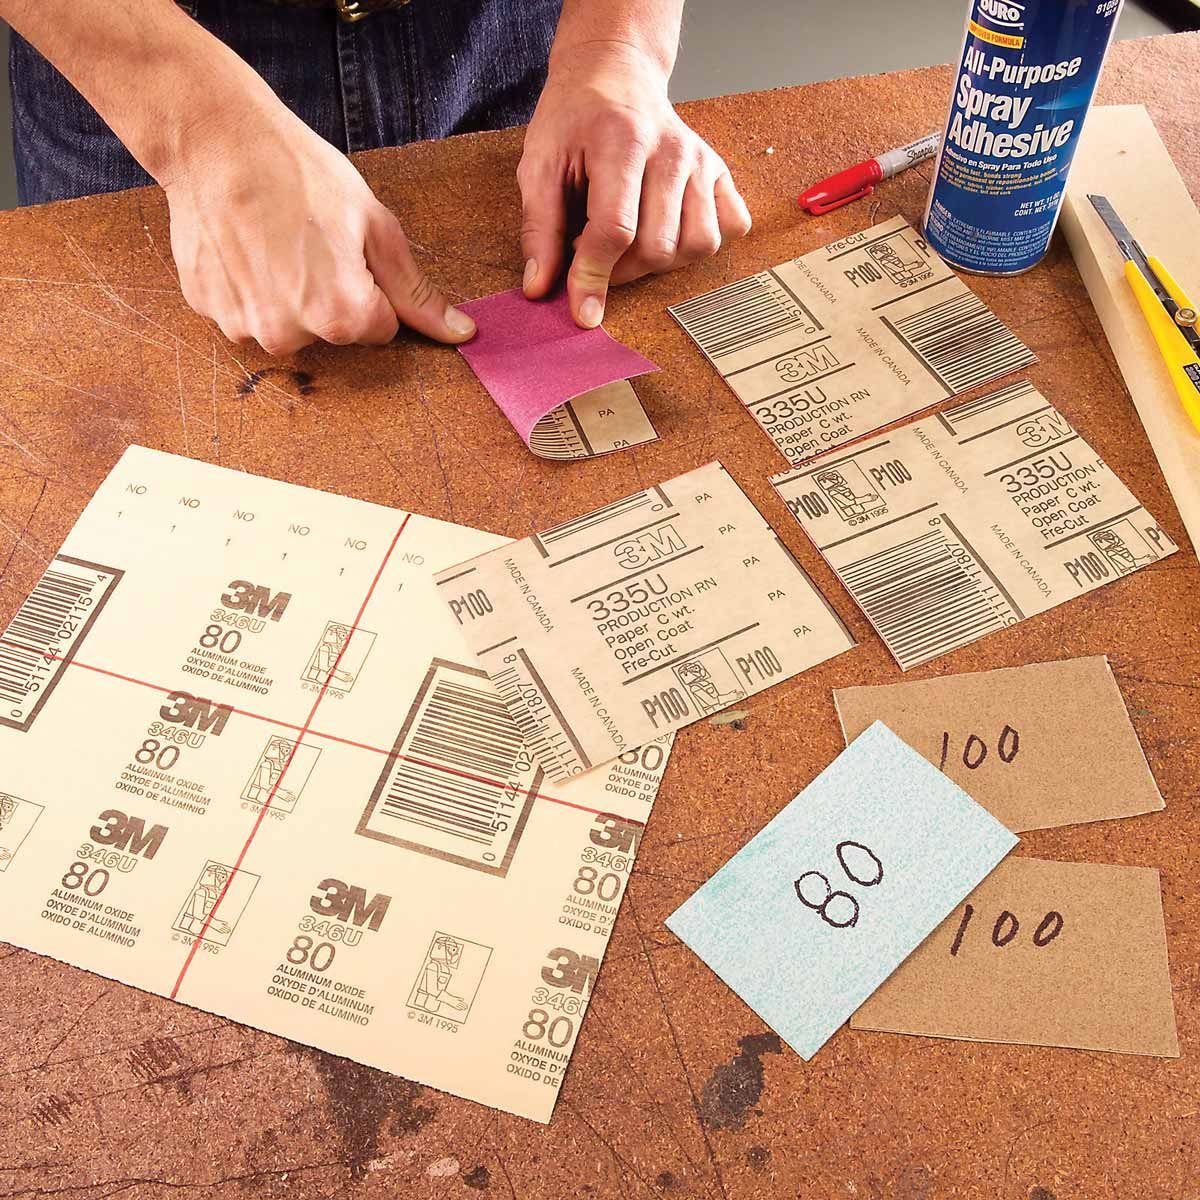
Sandpaper Cutting Jig
Make this simple jig for turning full sheets of sandpaper into smaller sheets to fit your finishing sander, sanding block or other device.
Cut the 1/8-in. deep grooves in the base using a table saw and thin-kerf blade, then attach the stop block. To use the jig, place the sandpaper grit-side down and run a sharp utility knife down the appropriate groove.
Sharpen Tools with Your Belt Sander
If you don’t have a bench grinder, you can sharpen chisels and other tools almost as well with a belt sander with a fine-grit belt. Click here to learn how to do it.
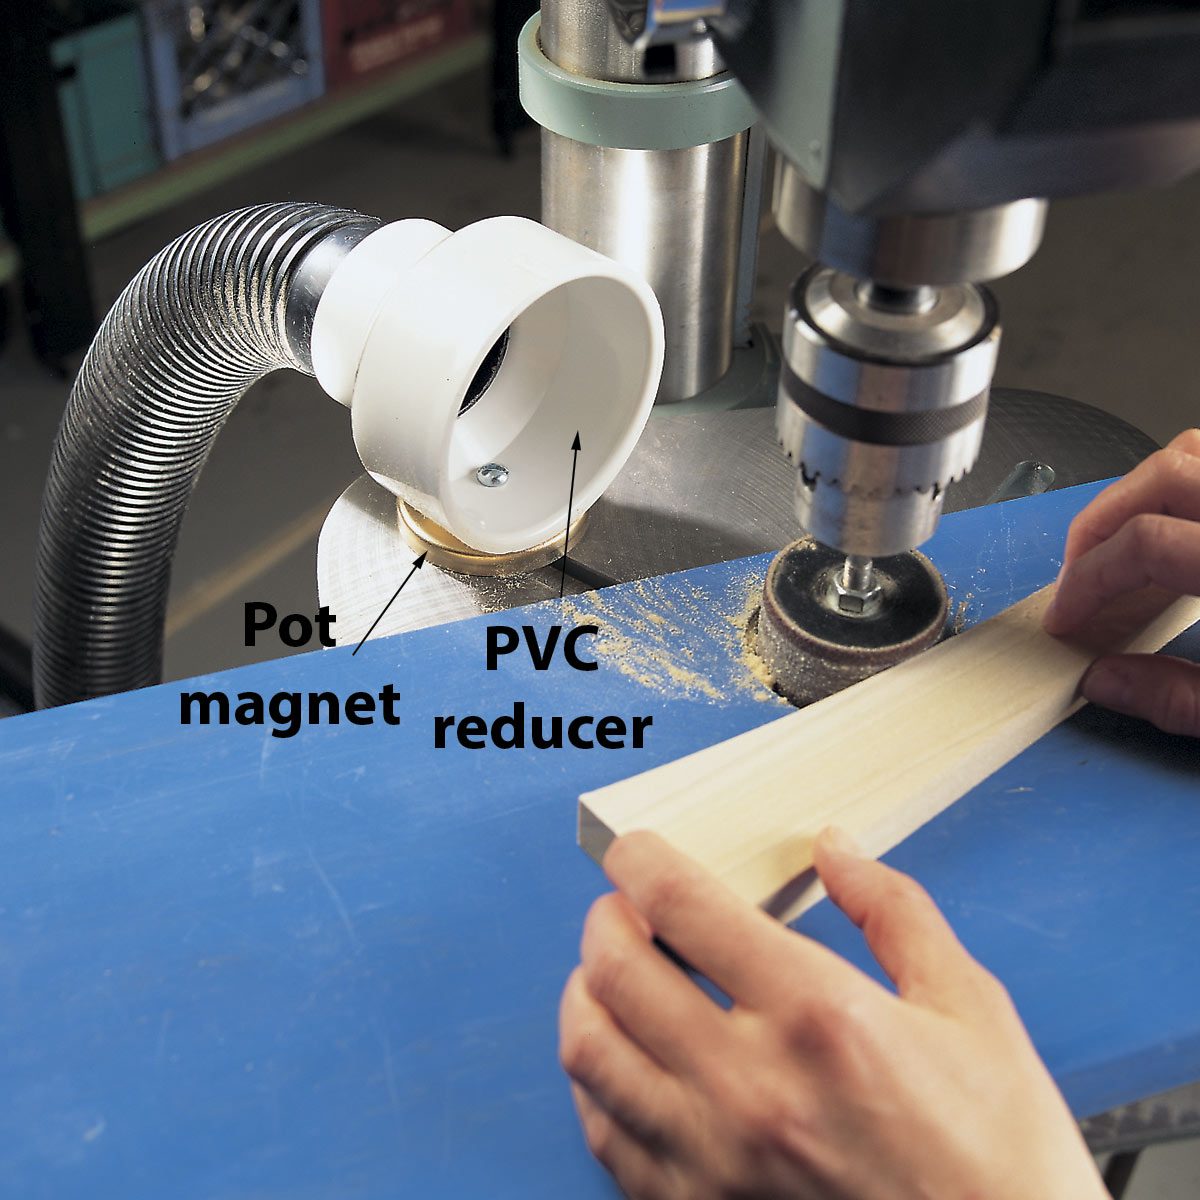
Drum-Sander Dust Collector Hack
Capture the dust that flies off a sanding drum before it fills your shop and lungs! All you need is your shop vacuum, a 3 x 2-in. PVC reducing coupling and a pot magnet. Bolt the magnet to the coupling and put the coupling over the end of the vacuum hose. A 2-1/4 in. dia. shop vacuum hose fits snugly inside the coupling’s smaller end without clamps or glue. Then just set the hose on the drill press’s metal table and let the shop vacuum eat your dust. You can use this setup on any power tool with a metal table.
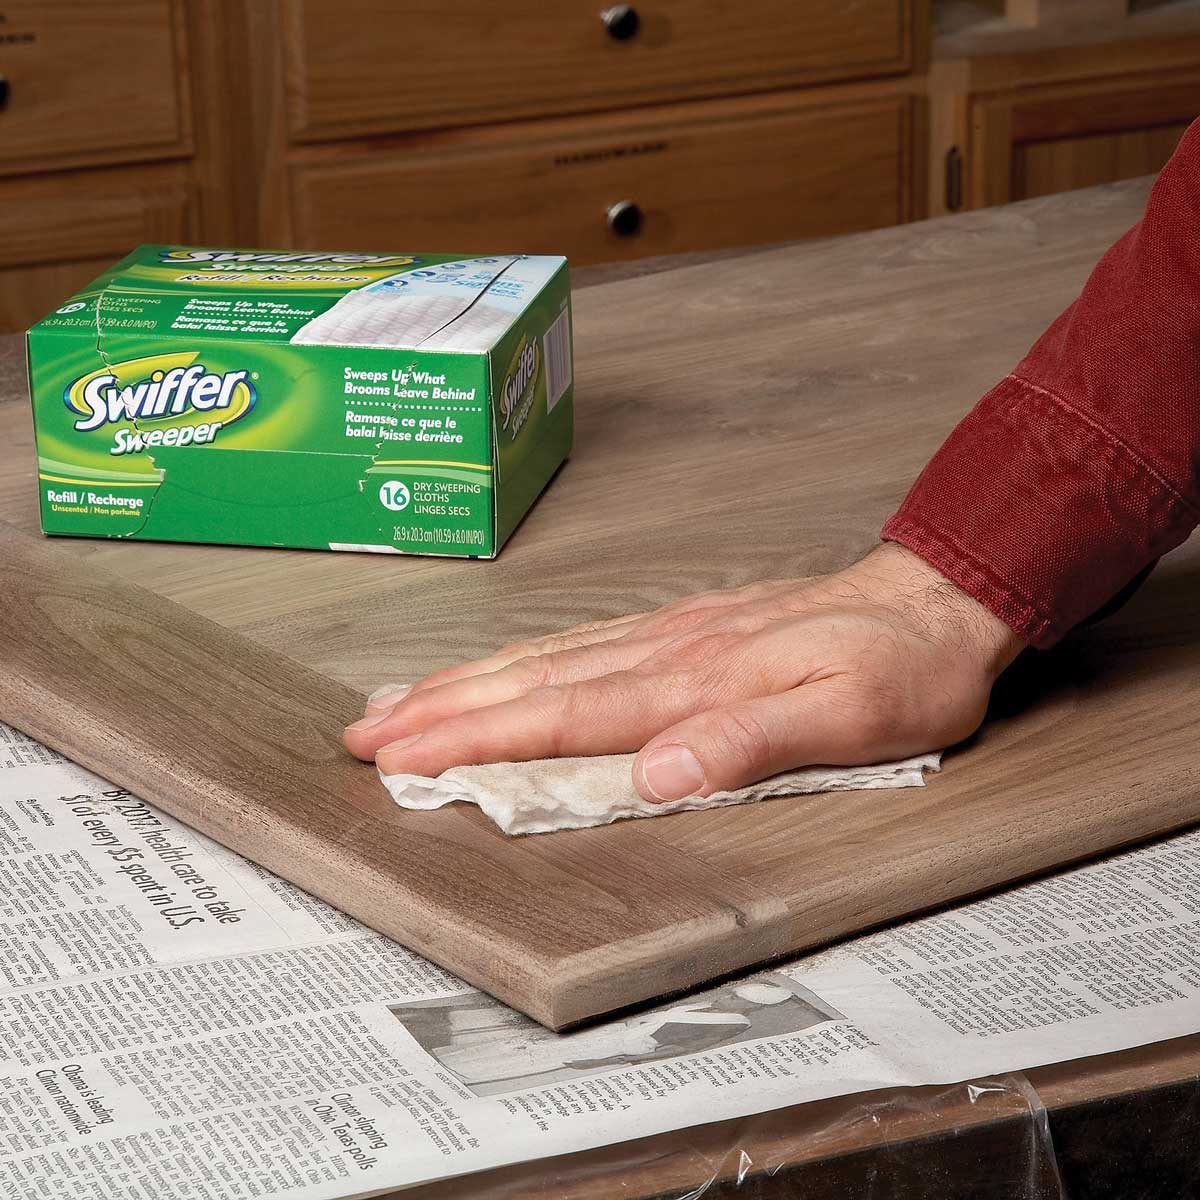
Swiffer Sheets for Sanding Projects
Before applying the finish, rub the project (with the grain!) with No. 0000 steel wool. You’ll lift sanding dust from the grain and burnish and shine the surface fibers. Follow up with a Swiffer Sweeper cloth ($4 a box at a grocery store) to wipe away any specks of dust or steel wool. Thanks to Gabriel Shearing for this professional finisher’s tip.
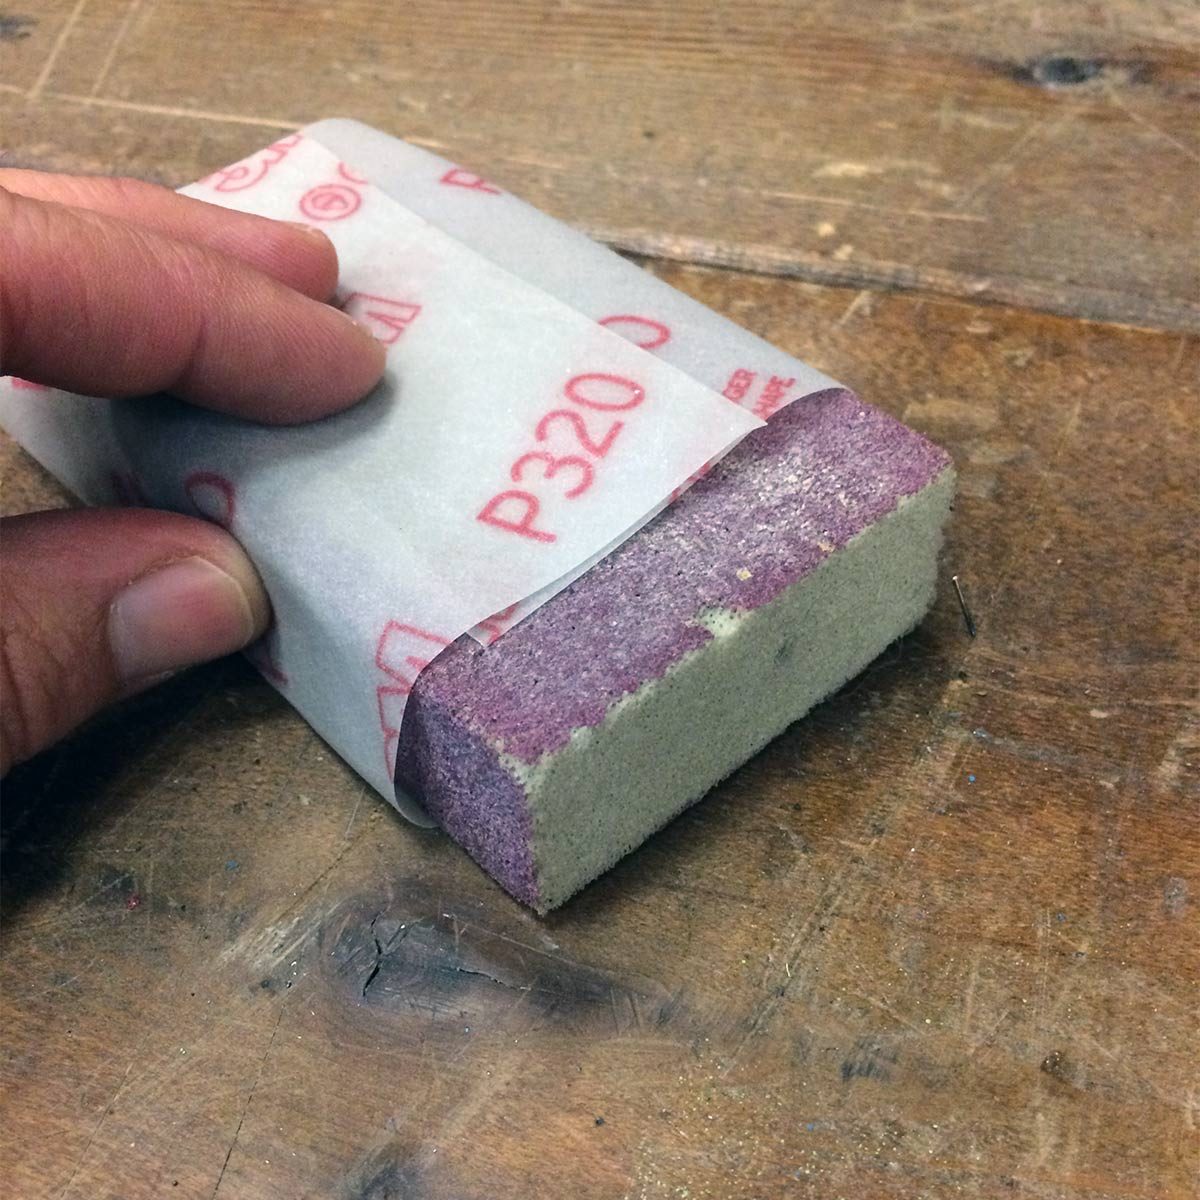
Disposable Sanding Blocks
In this video, Travis shows you how to make a quick batch of disposable sanding blocks to keep in your workshop.
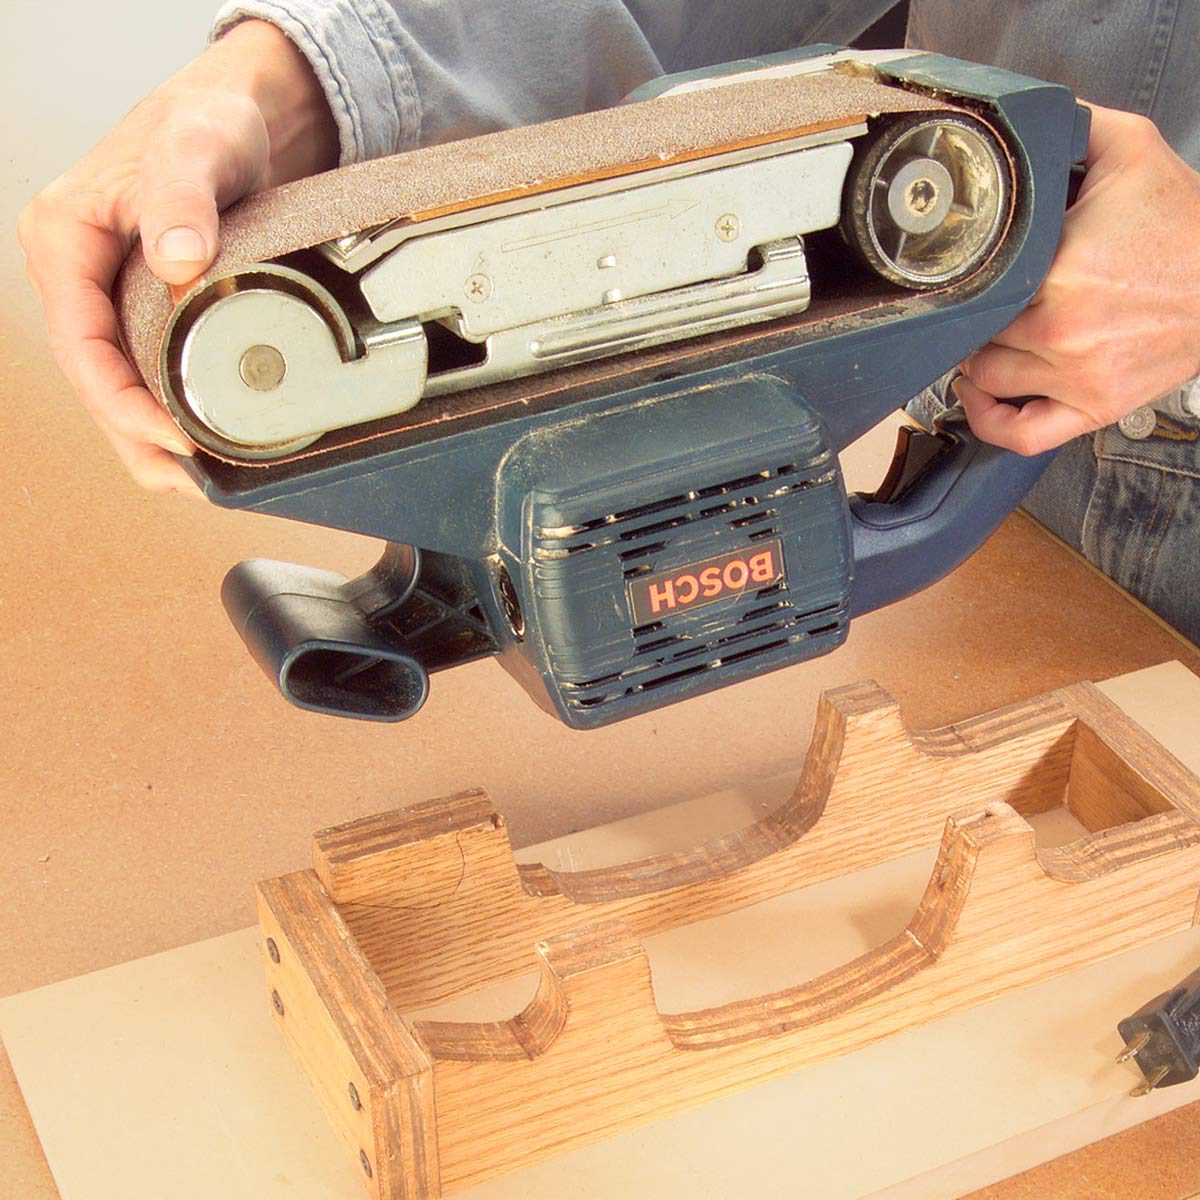
Stationary Belt Sander
This jig firmly holds your belt sander upside down for easier sanding of handheld project parts. Each sander has a different shape, so custom-cut the plywood sides with a jigsaw to fit yours. Work for a tight fit so the sander is rock steady while you’re working. Use clamps to hold small pieces and don’t wear loose clothing. Many thanks to reader Scott Miller for this tip.
Click here to see how to build it.
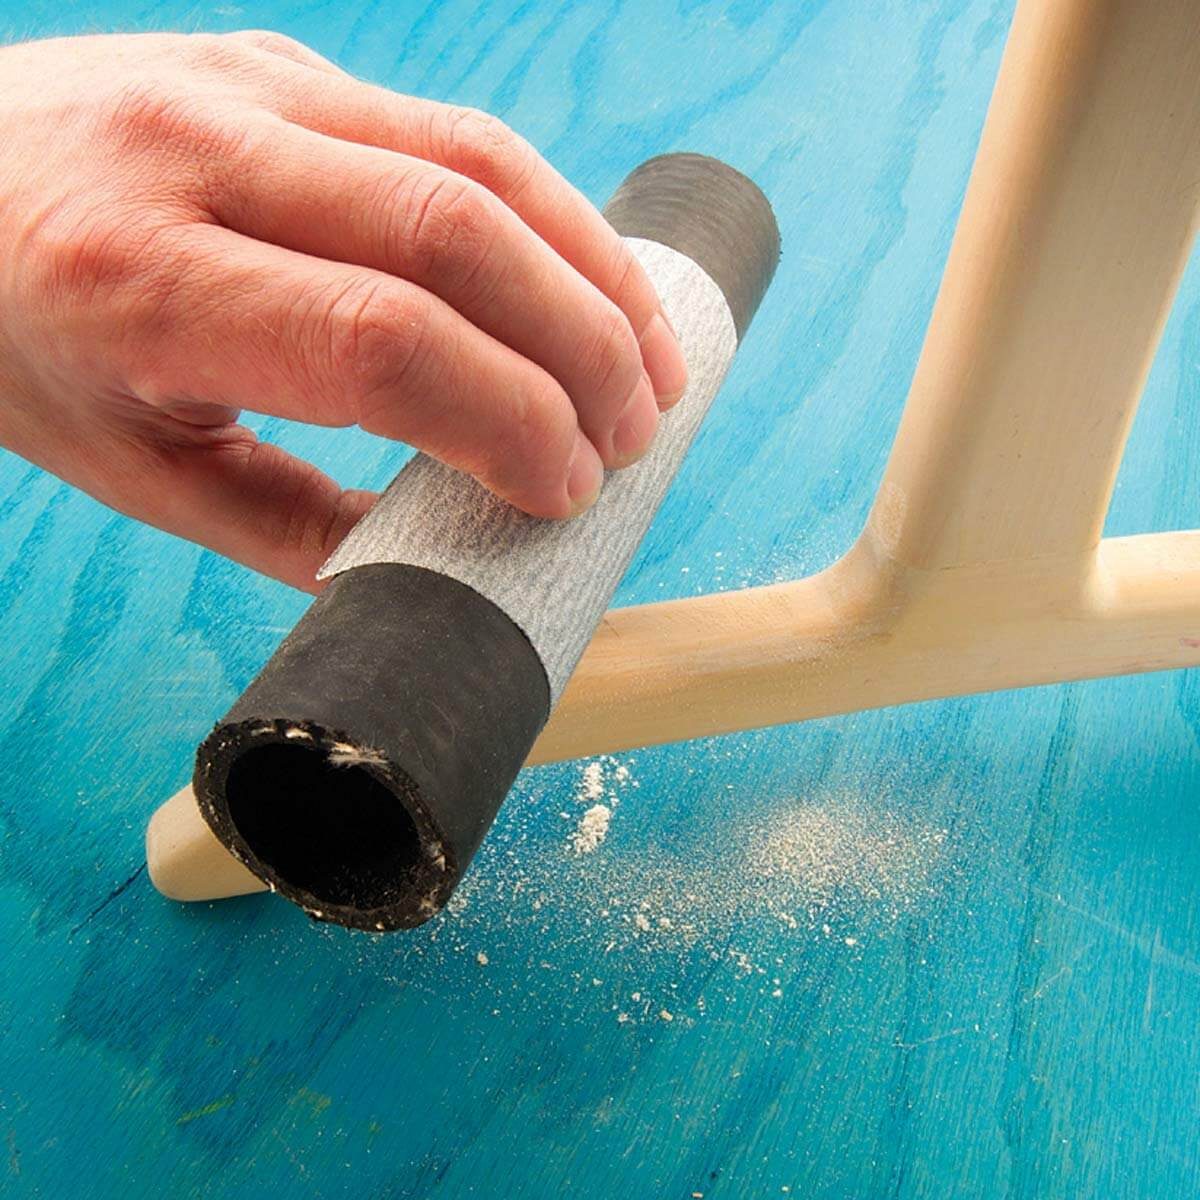
Use a Radiator Hose for Contours
The “hose sander” is another great tool for sanding the curvy contours of your woodworking projects. Saw off a straight piece of discarded radiator hose with a hacksaw, clean it inside and out, and wrap a piece of adhesive-backed sandpaper around it. It works great when you bear down for coarser sanding and is just right for lighter-touch finish sanding, too. Thanks to reader William Waite for this useful tip.
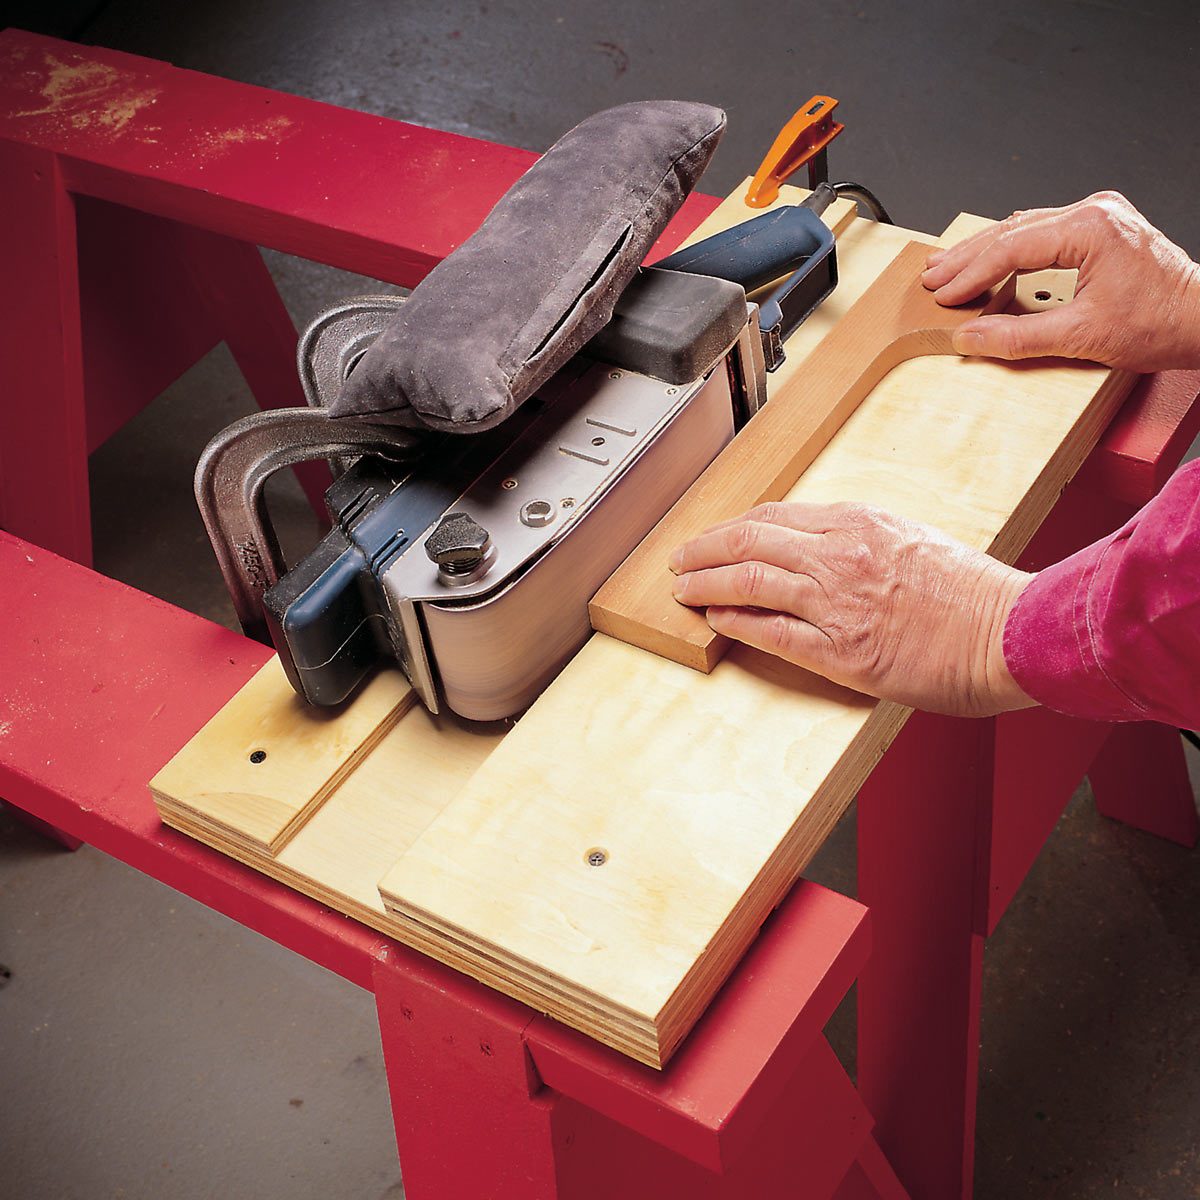
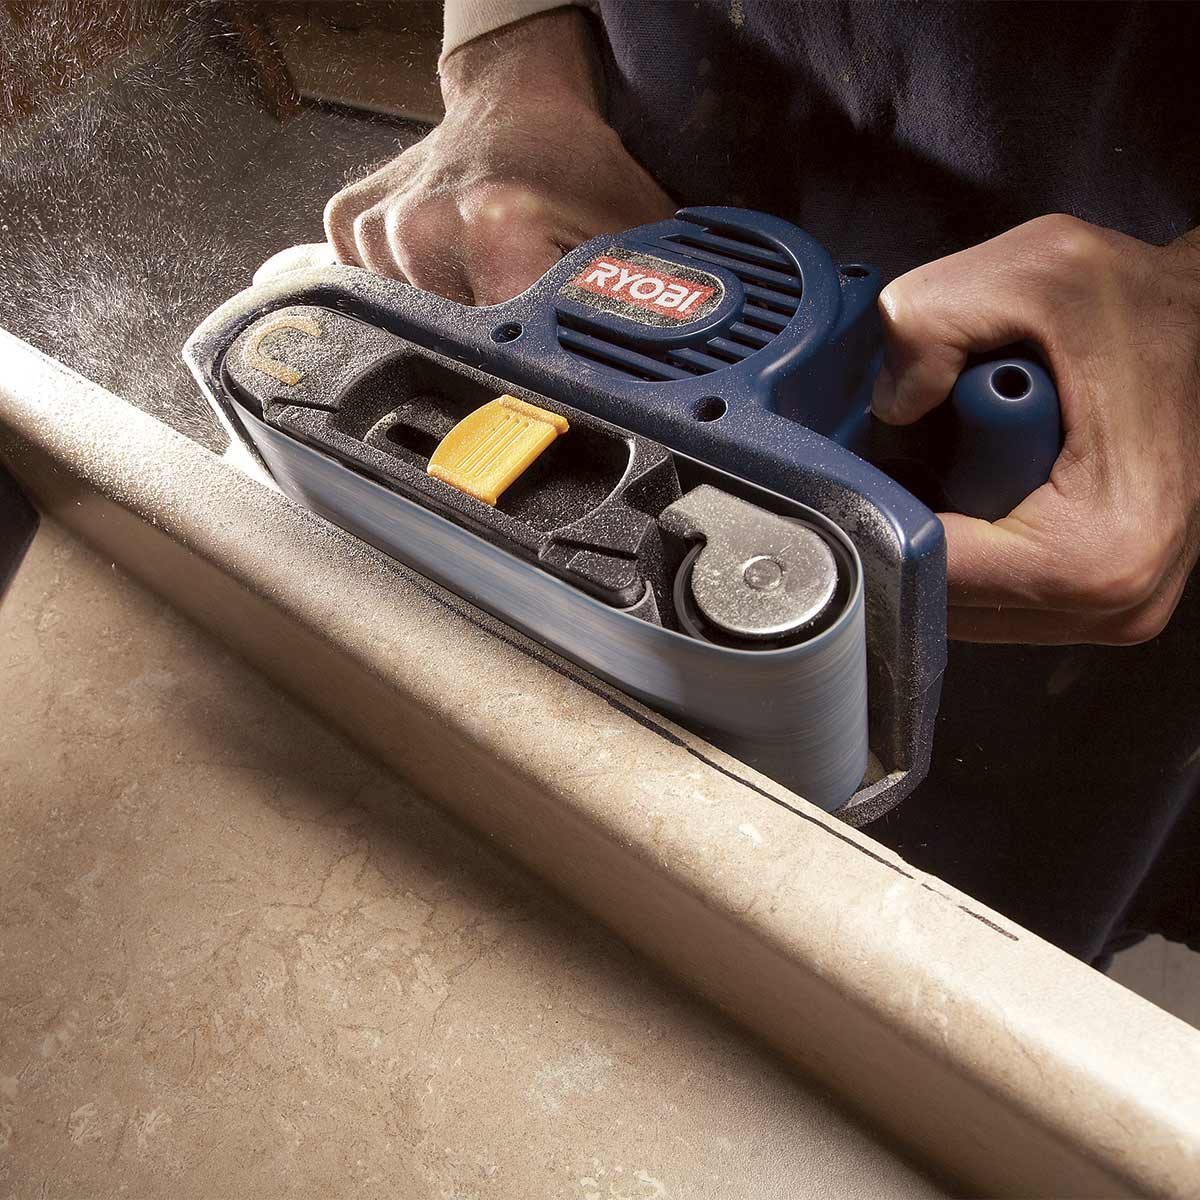
Low-Tech Edge Sander
A belt sander clamped securely on its side makes a great hands-free sander for sanding workpiece edges. Just screw a 3/4-in. feed platform to a larger 1/2-in. plywood base.You may also need a thin 1/4-in. plywood strip as shown to elevate the sander body. Clamp the sander to the assembly (snug it—don’t overtighten). If you’re sanding a bunch of pieces, you may need to add a piece of plywood after a while to the feed platform to equalize the wear of the sanding belt.
Watch this video to learn how to make a belt sander sanding block.

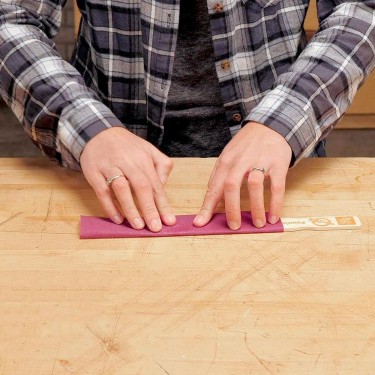
Thick-Skinned Sandpaper
Reader Maggi Thomas sent us a cool sanding tip. Put duct tape on the back of sandpaper and cut it into custom-sized strips for sanding in tight spots. The tape’s tough hide lets you sand without tearing the paper. The strips work great for sanding lathe turnings, cleaning dried glue from project parts, and doing any other job that requires a firm yet delicate sanding touch. Use a sharp utility knife and a straightedge to cut the strips.
Check out this sandpaper cutting jig.
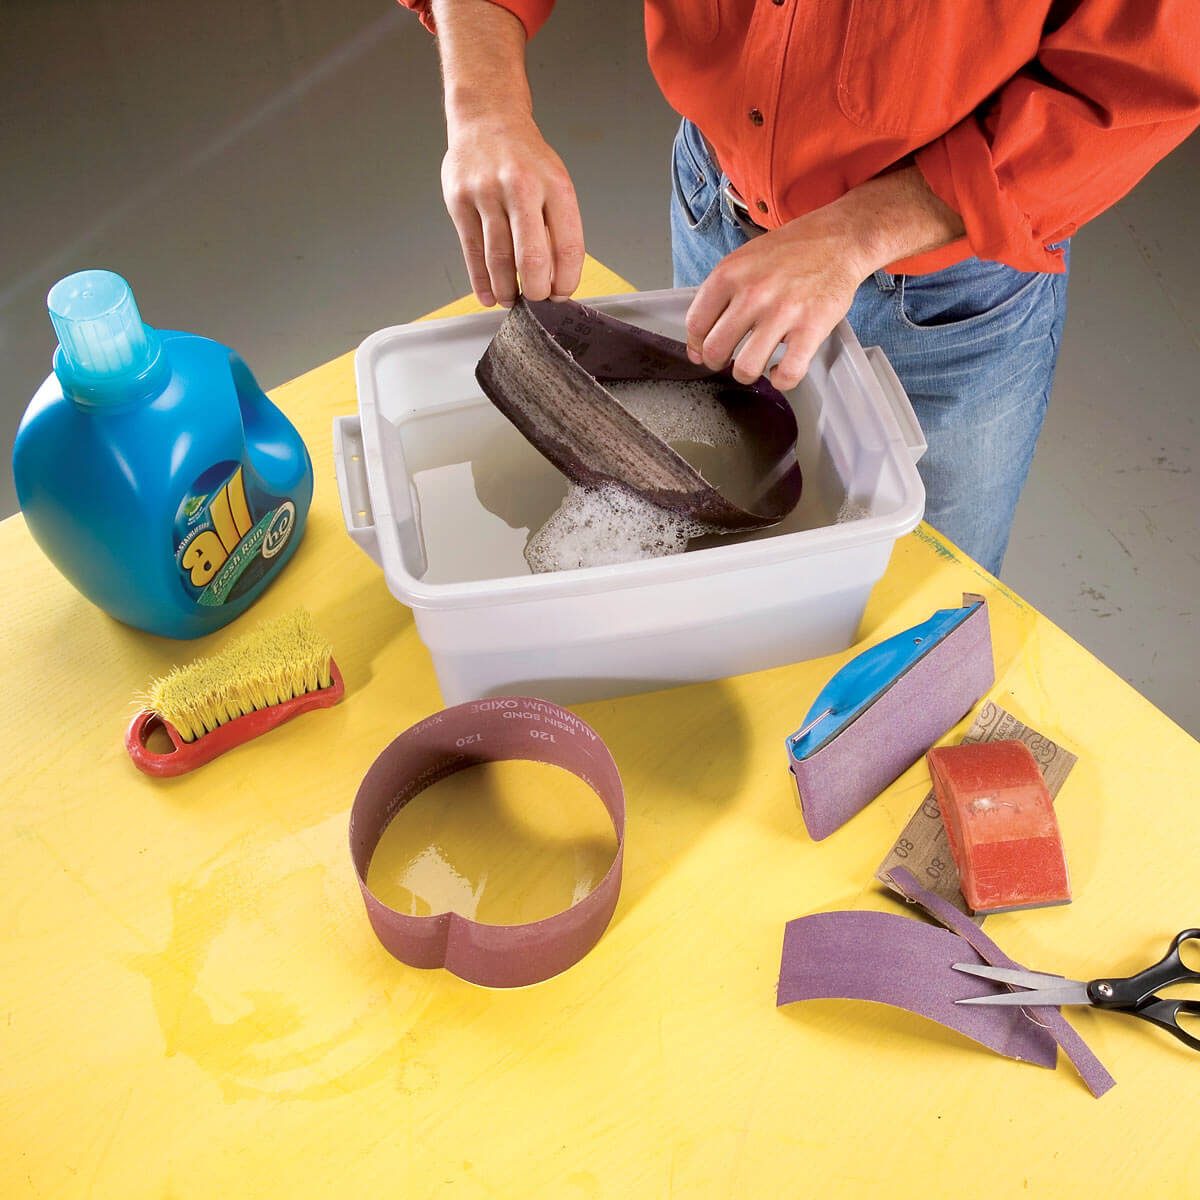
Laundry Day for Belts
Travis Larson sent us a neat tip to extend the life of those gunked-up sanding belts you’re probably holding over the trashcan right now.
Fill a bucket with hot water and laundry detergent, mix well, then toss in the pitch-covered, burned-out belts. Let them soak for several minutes, then scrub off the loosened debris with a stiff-bristled plastic brush. Set the belts aside, and when they’re dry, cut them into wide strips for sanding blocks or narrower pieces for freehand use on delicate or hard-to-reach sanding jobs. Resist the temptation to put the belts back on your power sanders; just use them for hand-sanding.
Plus: Belt sander reviews
Edge Sanding Platform
In this video, Travis shows you how to create a platform for edge sanding.
Everlasting Sponge
In this blog post, Brad talks about the perfect tool for gettingan ultra-smooth, glassy finish on wood.
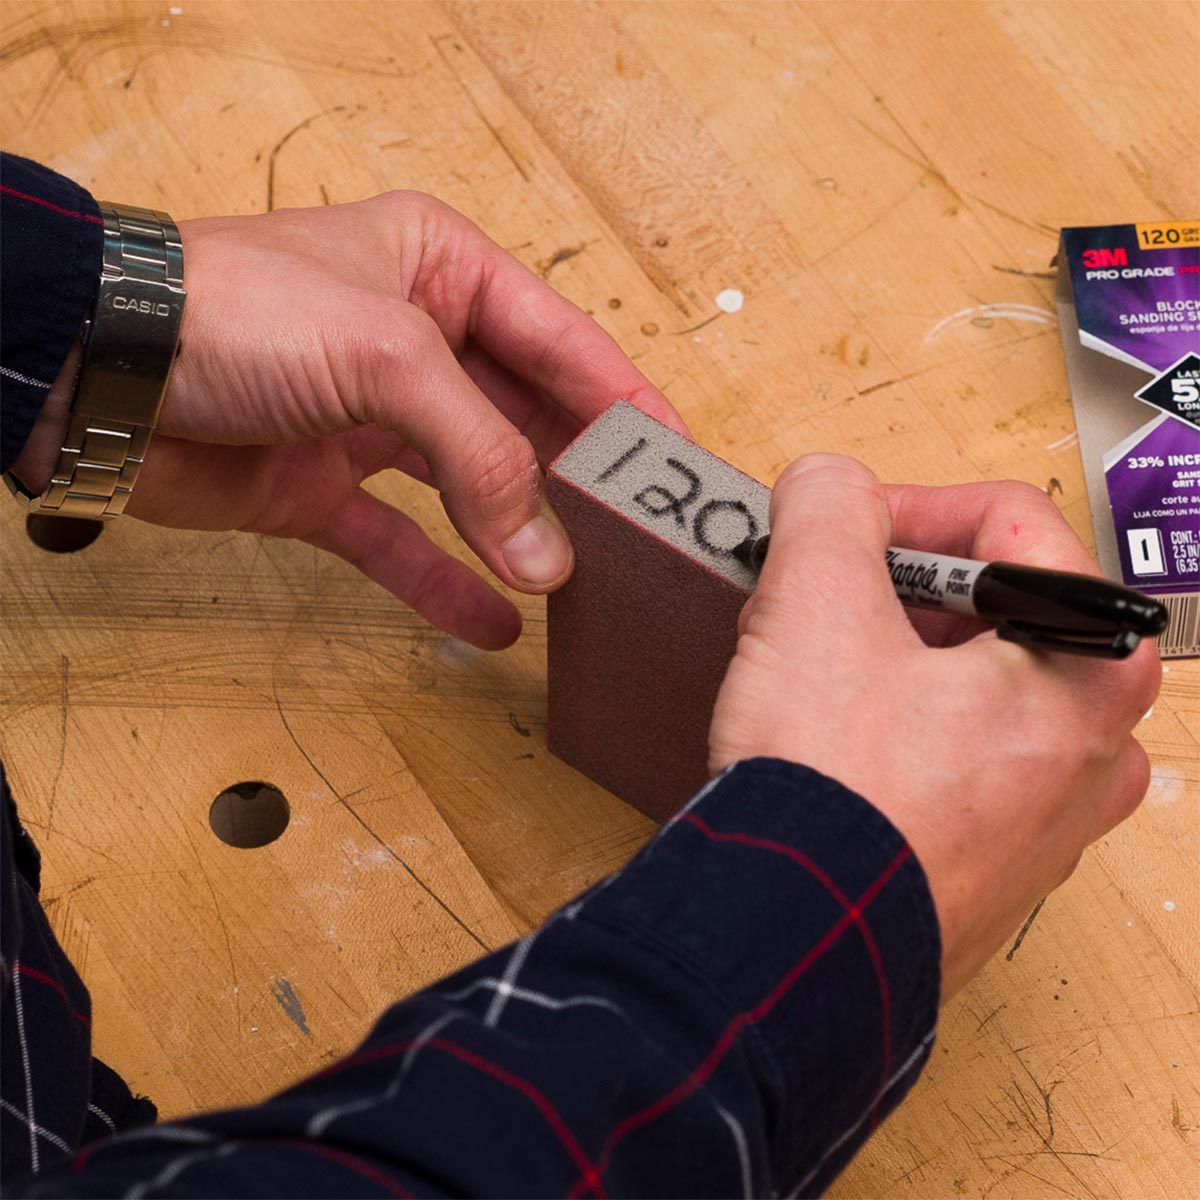
Sponge Grit Label
After completing an entire kitchen remodel, I had acquired a shoebox full of sanding sponges with different grits, but now I don’t know which block has which grit. I’d like to say I keep the original packaging for items like this, which would indicate the grit and other details for my sanding sponges, but that just doesn’t happen.
I learned my lesson! Now, before I toss the packaging in the garbage can, I write the grit number on the side of the sanding block with a permanent marker.— Matt Owczarczak
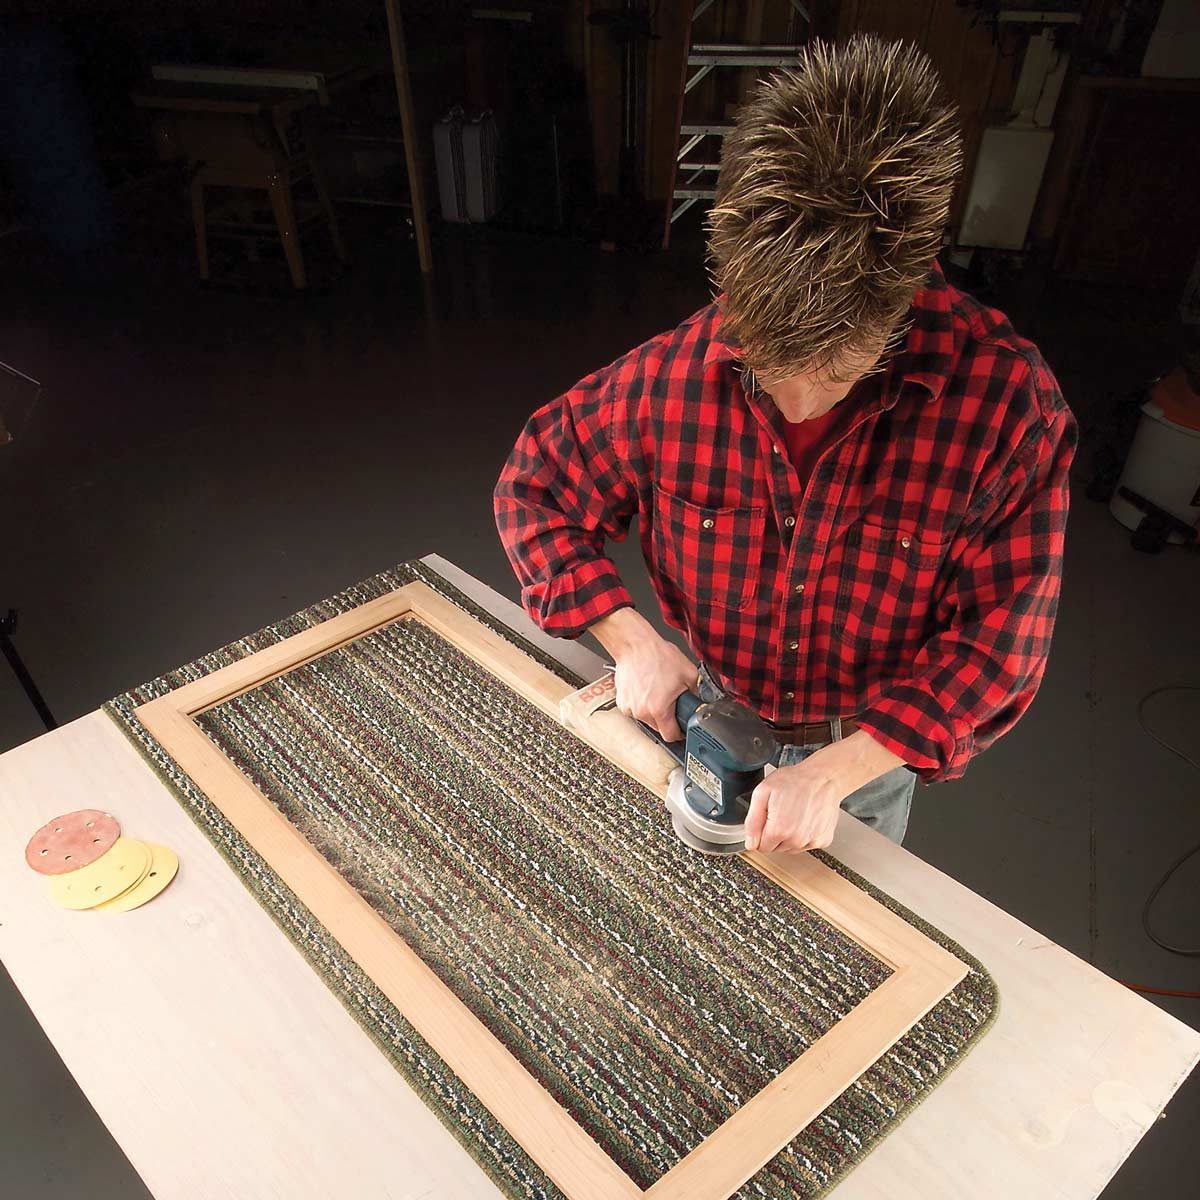
Folded Sanding Pad
Best power sander in your shop? A quarter sheet of sandpaper and your bare hand! To improve the longevity of this natural marvel, apply spray adhesive to the quarter sheets, then fold them over to make a double thick one-eighth sheet. They work great for sanding sculpted and molded edges, and the double-ply thickness lets you press hard without tearing a hole in the paper.
Here’s a tip for creating a sandpaper cutting jig.
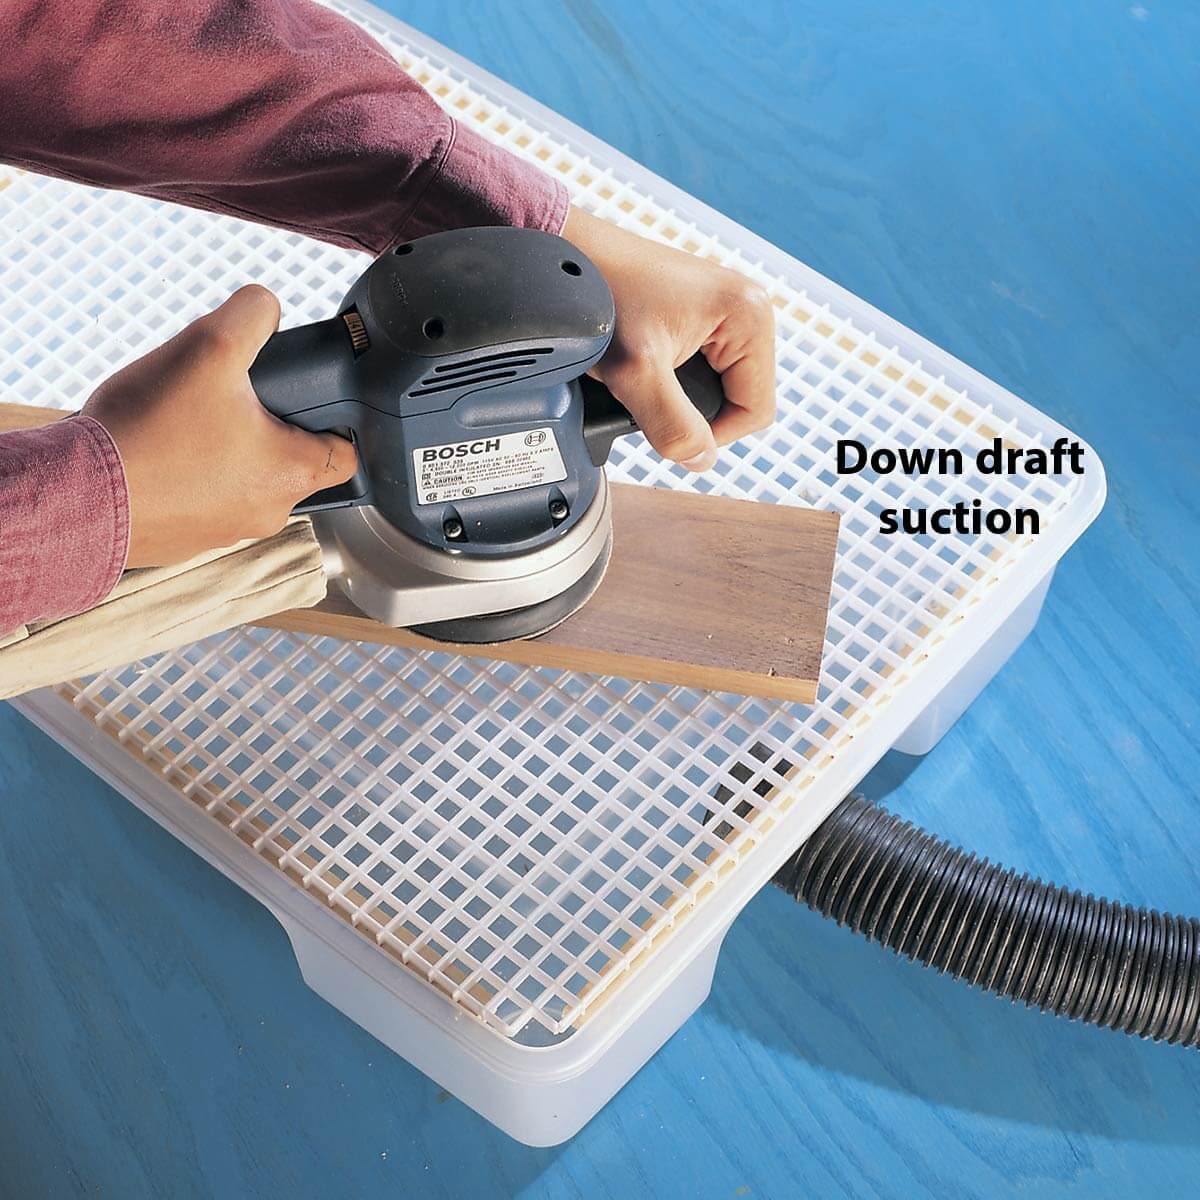
Down Draft Sanding Box
This easy-to-make sanding box really swallowed the dust in our tests. And it was sturdy enough to support larger workpieces. Learn how to build one for your shop here.
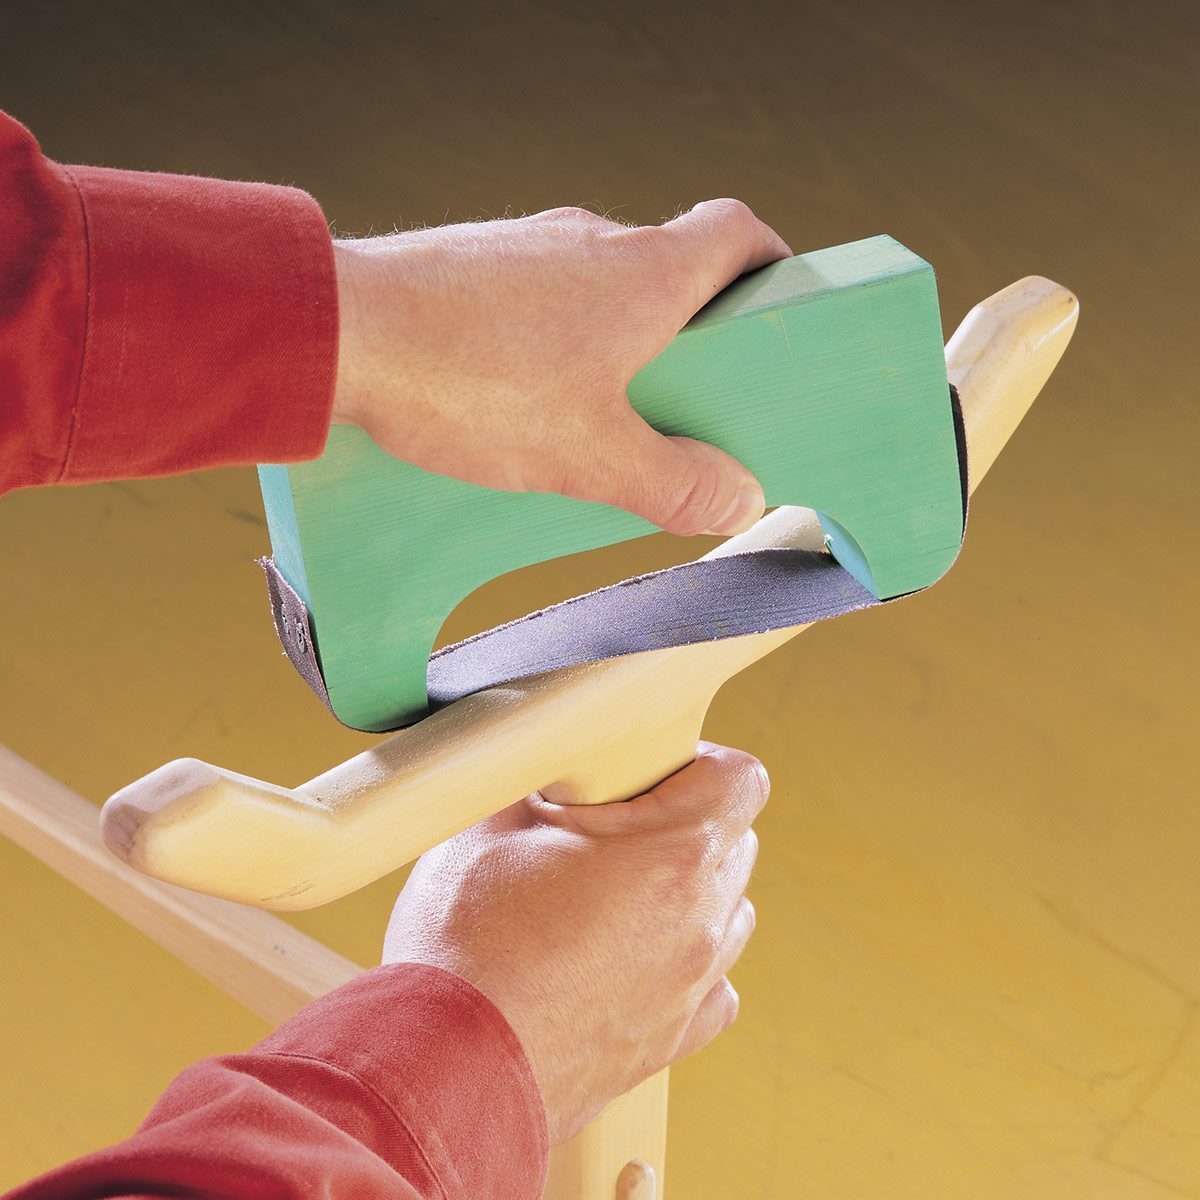
Custom Sanding Bow
Screw strips cut from cloth-backed sanding belts to shop-made wood bows of different thicknesses and use ’em to shape and smooth furniture parts and lathe- turned projects. The coarser grits remove wood quickly, and the finer grits will shine up curved surfaces in a jiff. You can screw the sandpaper strips on with varying tension to best fit the job at hand.

Avoid Over Sanding
Power-sand the tops of plywood edge-bandings with ultra-light pressure, use fine-grit sandpaper, and rub a pencil firmly along the glue joint before sanding to help monitor where, and how fast, the surface is being sanded away. If you press the sander more to the banding side, go slow and keep a hawkeye on the disappearing graphite. You’ll never waste a 4×8 sheet of expensive plywood—or two hours fitting and gluing on bandings—with an irreversible mistake.
Cushioned Contour Sanding
The pad of my random-orbital sander was a tad too firm for refining chair seats. It flattened out areas instead of creating the soft, subtle contours I was after. So I bought an extra pad base for the sander and softened the base by sticking a piece of 3/8-in.-thick closed-cell foam to the bottom with contact cement. My sander uses adhesive-backed sandpaper, which I just stuck right to the foam. (If your sander uses hook-and-loop sand-paper, just glue the foam to the extra base with contact cement and then buy some adhesive-backed discs.) I also unscrew the base and use it as a freehand sander to shape and sand legs, spindles and bowls I’m turning on the lathe.
Build a Better Block
To keep the sandpaper from tearing on the edges of his 2-1/2 x 5-in. wooden sanding blocks (custom-made to fit quarter sheets), Ken glued a layer of cork on the bottom.
“Now the paper doesn’t tear, and even better, I can press down hard on scratches. My fingers hold the paper on the sides of the block just fine, so there’s no need to tape it,” he says. You can buy a roll of cork for $5 at home centers.

Legible Sanding Discs
Hook-and-loop sanding discs work great on sanding jobs, and you can reuse them several times before they’re worn out. But it’s almost impossible to read the grit labels on the discs after you’ve used them once because the markings get scrubbed off by the loops. Do what Matthew Holmes does: Whenever you open a new pack of discs, write the grit label on the back with a permanent marker. Now you’ll switch from grit to grit without straining your eyes.
Plus: Which power sander is best for sanding cabinets? Find out here.
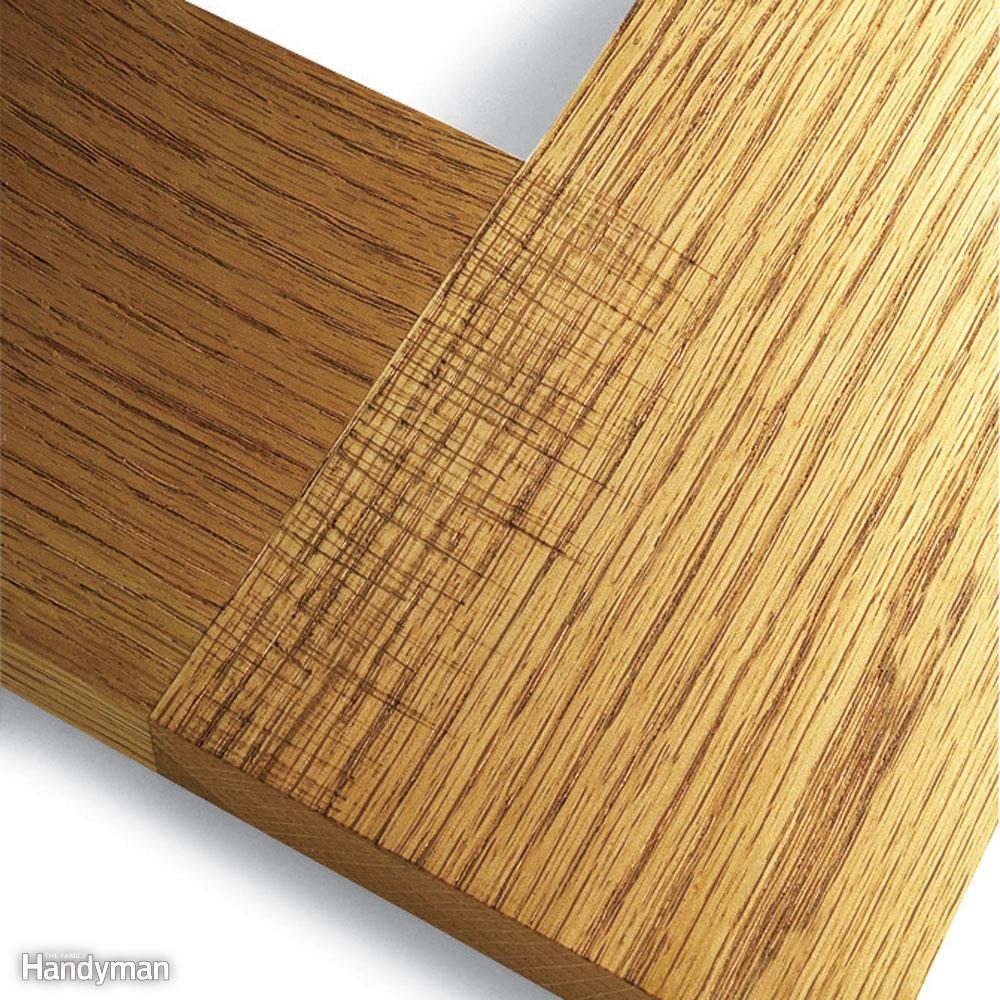
Wood Finishing Techniques: Sand With the Grain
Sand with the grain when hand sanding or using a belt sander. Scratches are hard to see when they run parallel to the grain. But even the lightest scratches across the grain are obvious, especially after staining.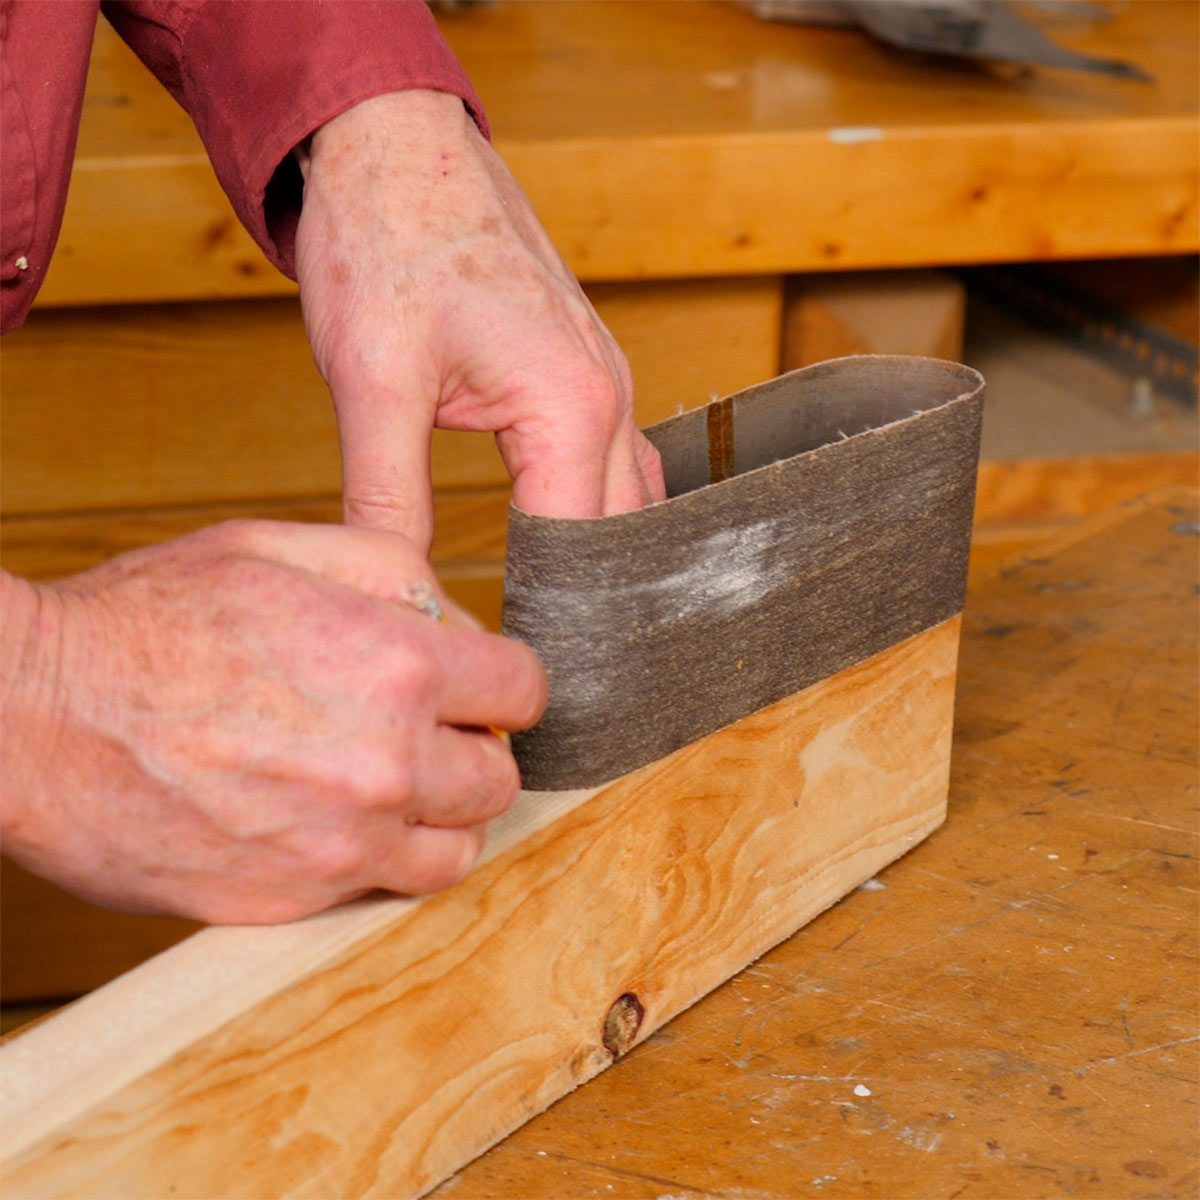
Belt Block
A long sanding block built to receive belt sander belts is a nice shop accessory. And you’ll use it more often than you think. Watch this video, as Travis shows you how to make it.
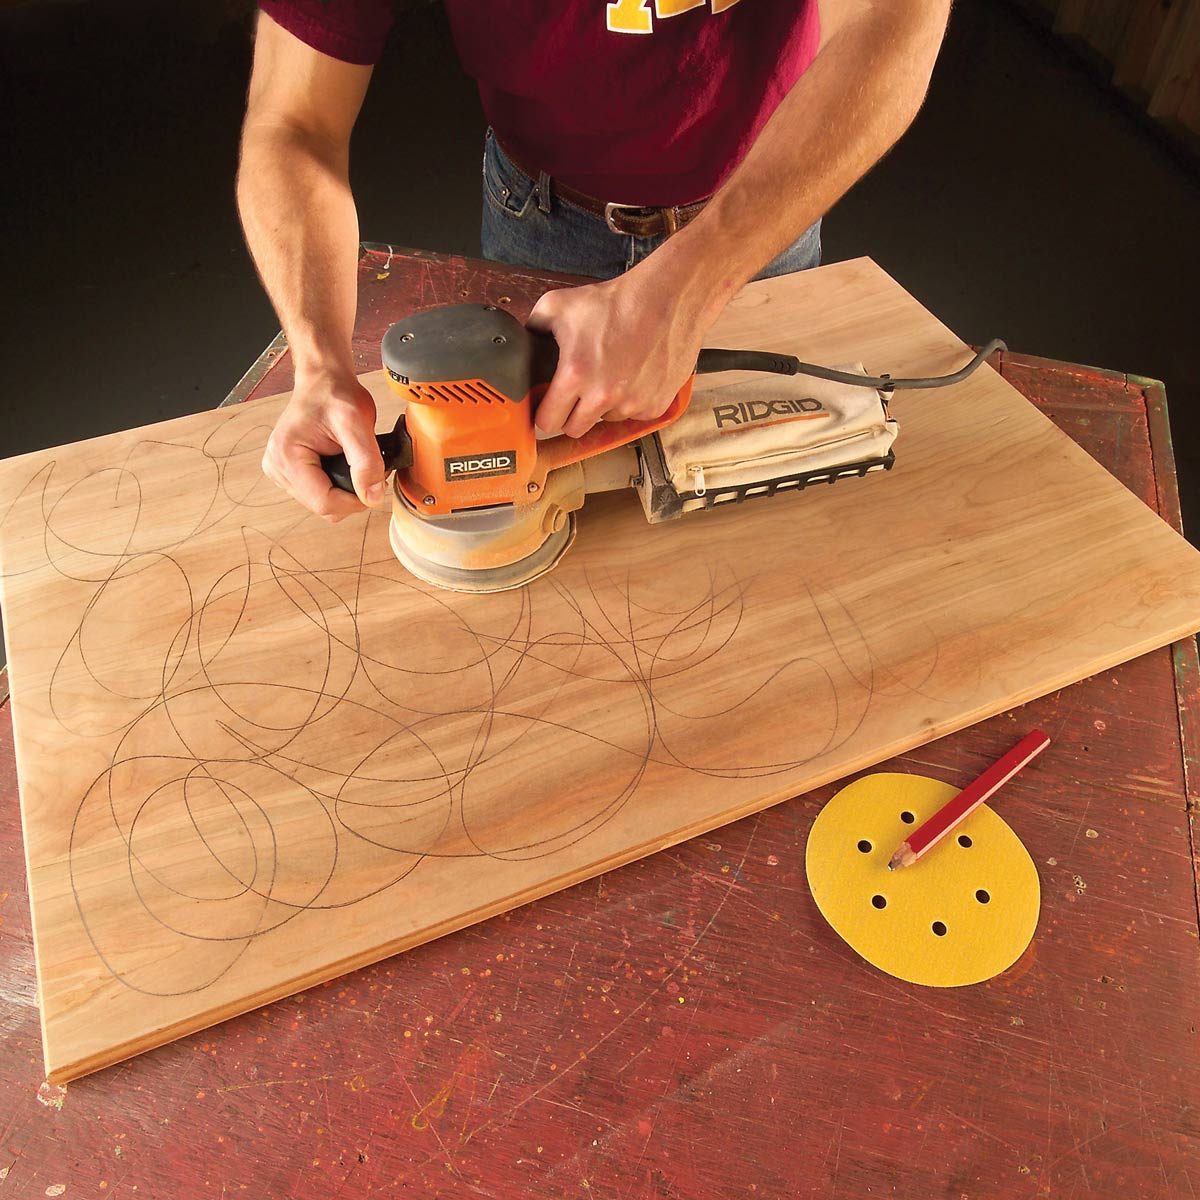
Pencil Visual Aid
Here’s a great old tip that’s worth revisiting. Can’t tell where you’ve sanded and where you haven’t? Scribble light pencil lines over the surface, and then sand away until they’re gone. You’ll sand the entire surface without missing a spot, even out hard-to-see high and low areas, and know when to switch to a finer grit of sandpaper. The finer the grit, the lighter the pencil lines should be. It’ll take for-ever to sand off dark lines with fine grits. Our thanks to Karen Dybdahl for this very smooth tip.
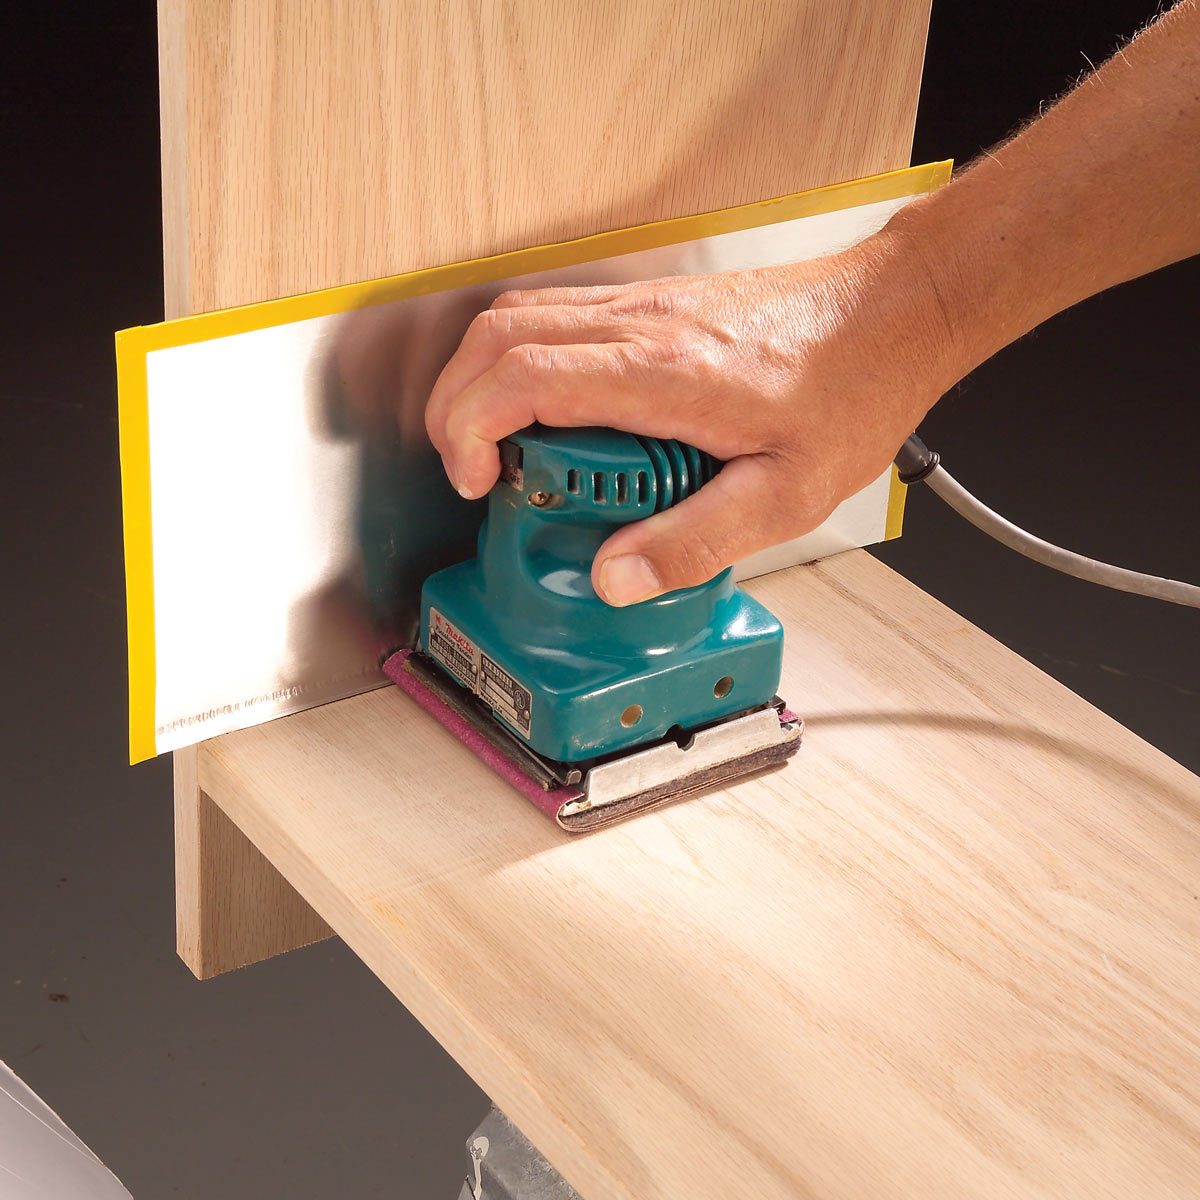
Flashing Shield
When you’re sanding in the corner of that next masterpiece, your vibrating or random orbital sander can dig some nasty scratches or dents with the sander body and the sandpaper on adjoining surfaces. And they’re nearly impossible to fix.
Try this bulletproof tip from Leo Tellgren. Hold a small sheet of metal flashing or plastic laminate between the sander and the surface you don’t want dinged up, and then sand as close as you want with no worries. Scratches go on the metal, not on the wood.
Learn how to get a smooth polyurethane finish on your woodworking projects.
Double-Duty Drums
If you sand a lot of thin wood on your drum sander, you’ll wear out only the bottom part of the drums. Flipping them over allows you to use the top, but the middle remains unused. Here’s a frugal solution, courtesy of reader Robert Allen: Cut the sanding drum in half and flip the parts end for end.
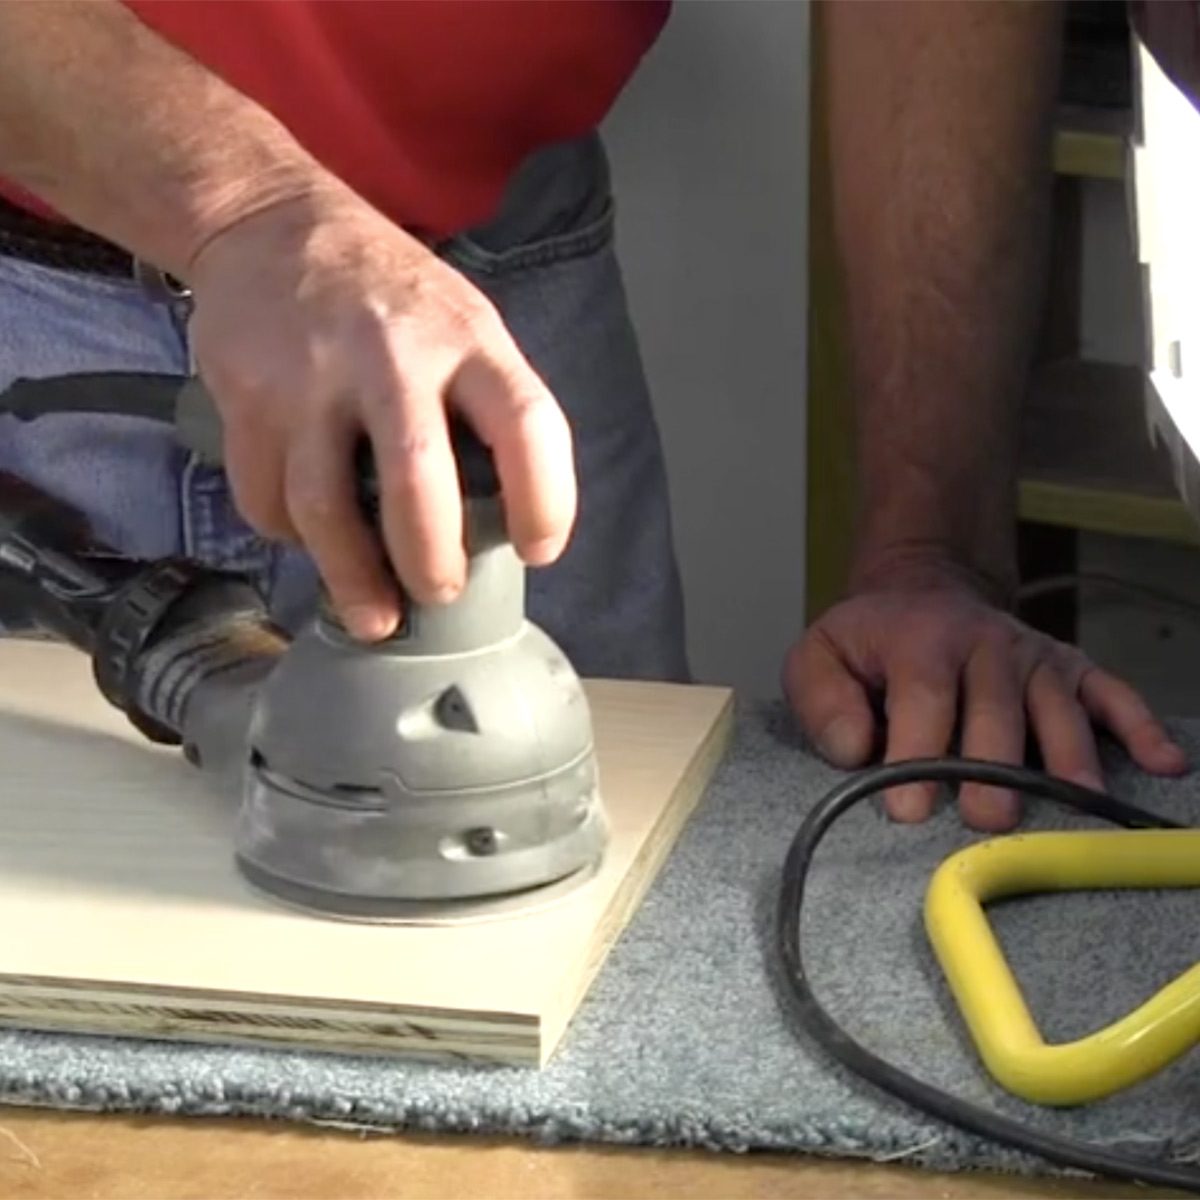
Carpet Cushion
Don’t scratch up the workpiece you just sanded by flipping it over on a dinged up workbench. Next time you sand a project, lay down a scrap piece of carpet to protect the wood, keep it stationary as you sand and dampen the sander vibrations on your hands. No scrap carpet around? A 2 x 6-ft. washable runner ($8 at a home center) works great—just shake it out between jobs and roll it up for storage. Thanks to Dan McGuinn for this neat tip.
Everything You Need to Know About Belt Sanders
Learn tips to use your belt sander more effectively and more safely, as well as how to buy a belt sander and what belts work best.
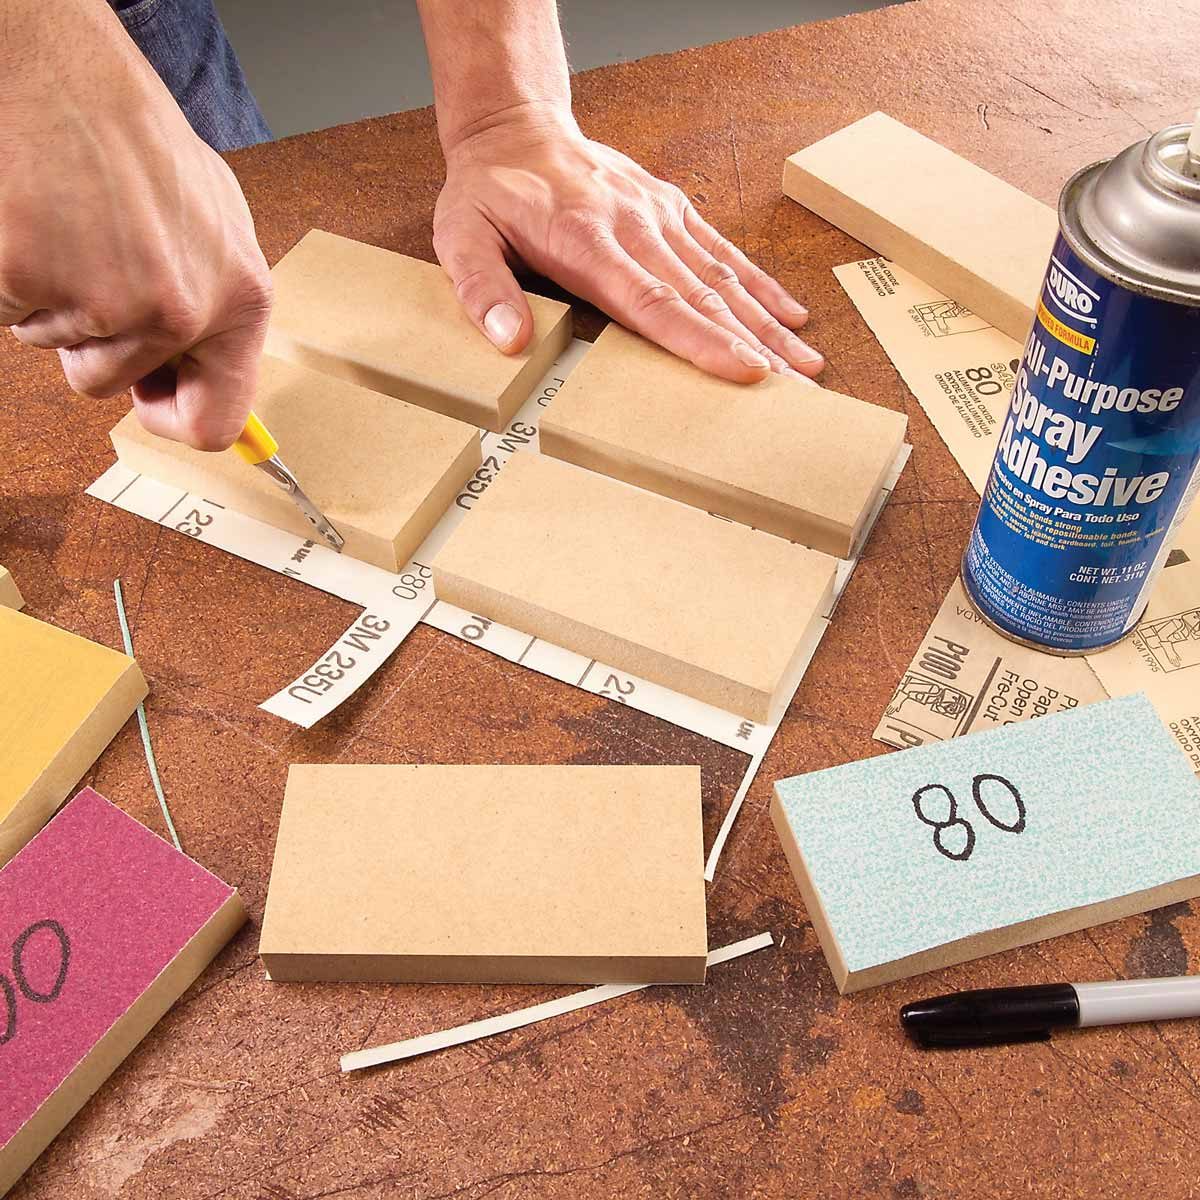
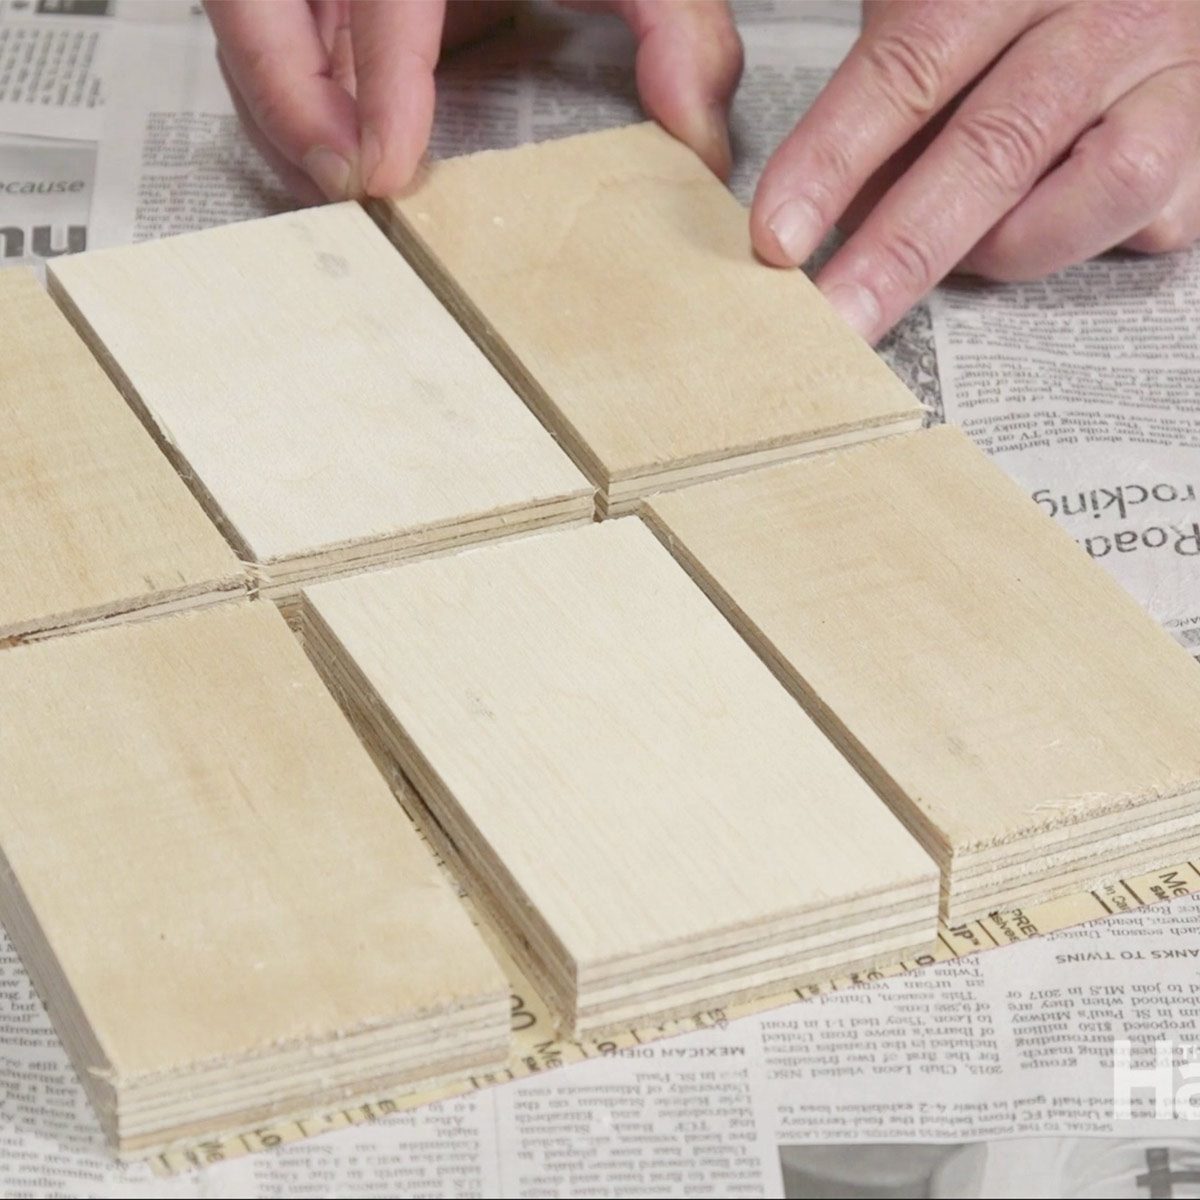
Throwaway Blocks
Glue up a bunch of disposable sanding blocks and stop fussing with reloadable store-bought blocks. When the sandpaper’s used up, toss them and make more. A 2 x 4-ft. piece of 3/4-in. medium-density fiberboard (MDF) will make a lot of medium and fine sanding blocks. Saw the fiberboard into 2-1/2 x 5-in. blocks. Then space the blocks—six per sheet—on sandpaper coated with spray adhesive. With a sharp utility knife, trim the sandpaper flush with the blocks. Write the grit size on the sandpaper with a permanent marker. It’ll be easy to find the grit you need, and the ink won’t stain your wood.
Watch a video to learn how to make your own sanding blocks.

Dustless Drilling and Drum Sanding
Whenever I have curves to sand, I chuck a sanding drum into my drill press. The only problem is that the sawdust flies everywhere. I wanted to catch the dust with my shop vacuum, so I made a bracket to hold the nozzle. I glued together two 3/4-in.-thick pieces of medium density fiberboard (MDF) and cut out the curved shape with my jigsaw. When I want to use it, I just clamp it to my drill press table. I made the hole just big enough so that the tip of the nozzle fits snugly. — reader Doug KaczmarekHere are other woodworking projects.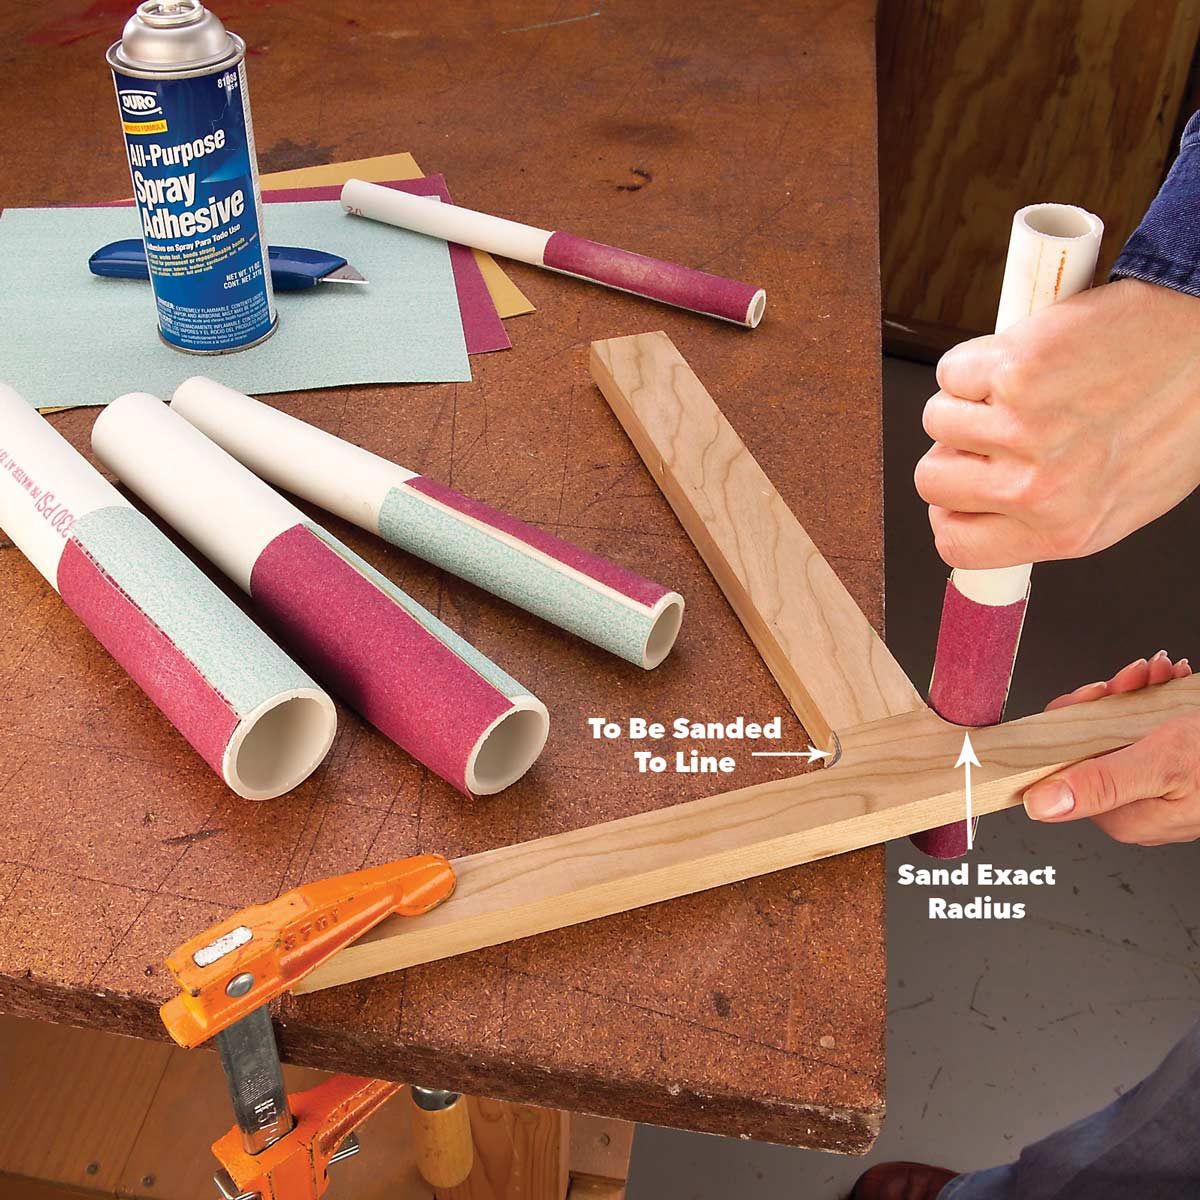
PVC Sanding Files
Stick sandpaper to cutoff pieces of PVC water pipe with spray-on adhesive and you'll be able to sand concave curves to perfection. PVC pipe is labeled by inside diameter; here's an index for the outside diameter of useful pipe sizes.- 1/2-in. i.d. = 7/8-in. o.d.
- 3/4-in. i.d. = 1-in. o.d.
- 1-in. i.d. = 1-1/4-in. o.d.
- 1-1/4-in. i.d. = 1-5/8-in. o.d.
- 1-1/2-in. i.d. = 1-7/8-in. o.d.
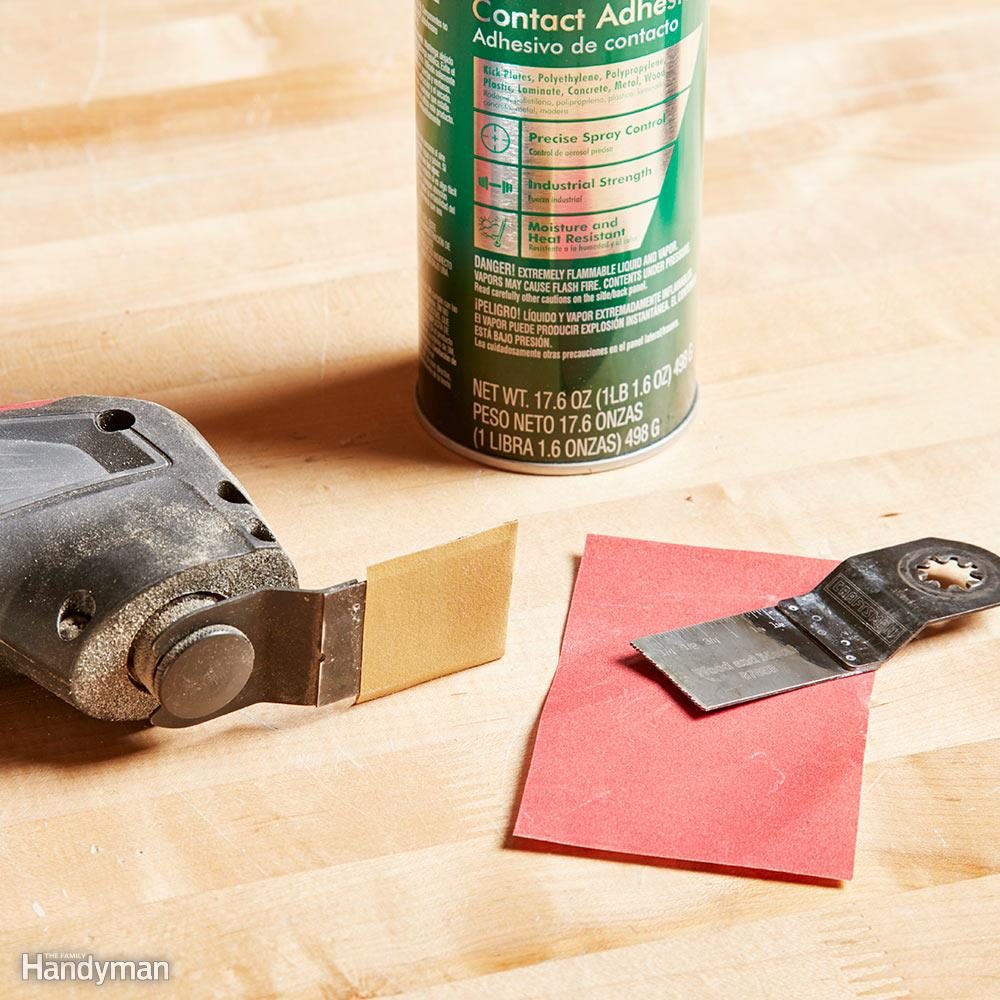
Homemade detail sander
It can be hard to sand louvered doors and shutters and other items that have a lot of tight spaces. Oscillating tools with sanding pads work great, but the sanding pads don't always come with the tools and are expensive to buy. That's why I make my own using a dull blade and custom-cut sandpaper glued on with spray adhesive. When the sandpaper gets dull, I just peel it off and stick on a new piece.
- Mitch Brodkin

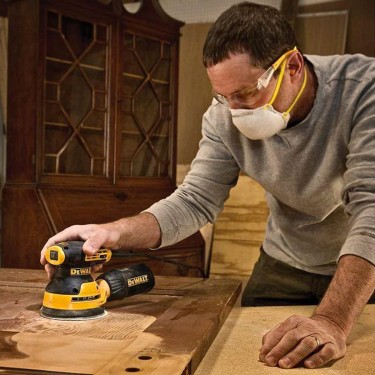
Hand Sanding 101
With a few special tools and good sandpaper you can smooth wood easily and quickly by hand with first-class results. Often even better than with a power sander. We tell you how to choose the best sandpaper for the job and demonstrate several of our favorite tools.
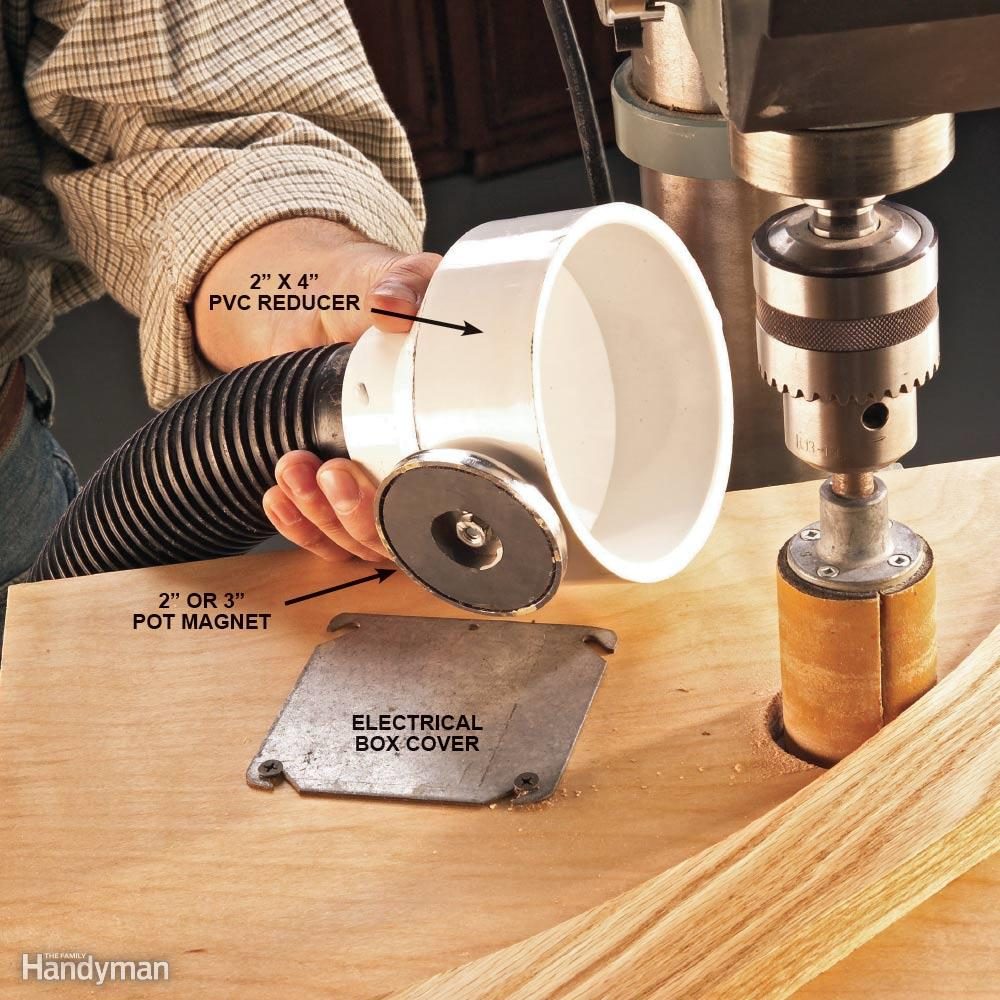
PVC Dust Catcher
Vacuum dust and chips right at the source! Bolt a 2-in. pot magnet (available at home centers and hardware stores) to a 4-in. x 2-in. PVC pipe reducer and position it near the sander, saw, router or lathe that's making a dust storm in your shop. A 2-in. shop vacuum hose 'press-fits' nicely in the 2-in. reducer end, and the pot magnet ferociously grips any metal surface.If the working surface near the dust source is wood, screw a blank steel electrical box cover to the surface to hold the dust chute on target.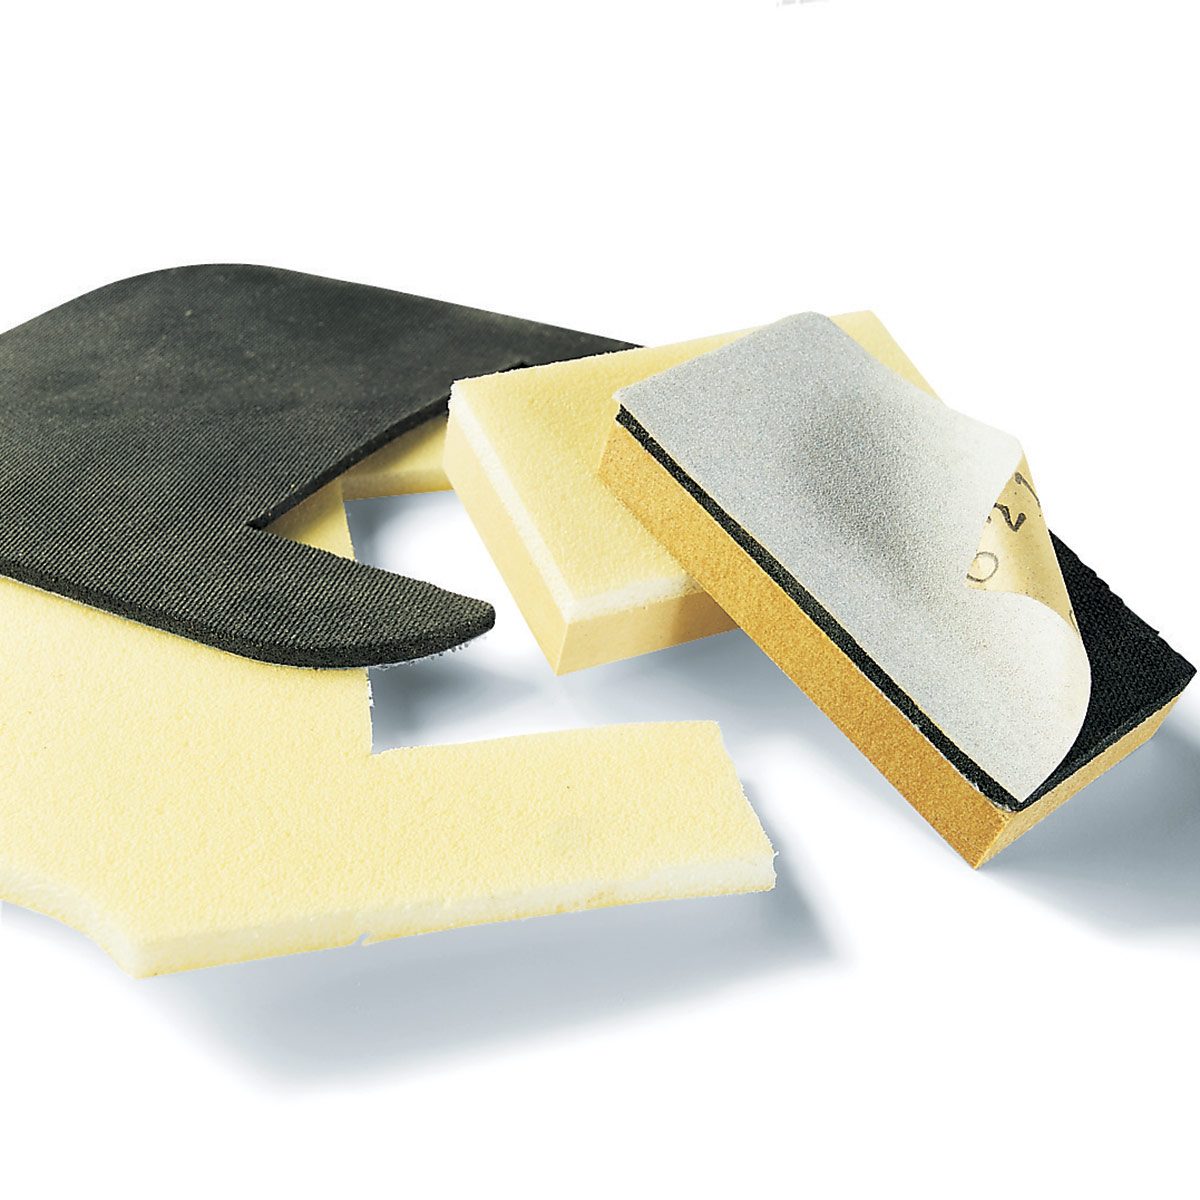
Most Incredible Sanding Block
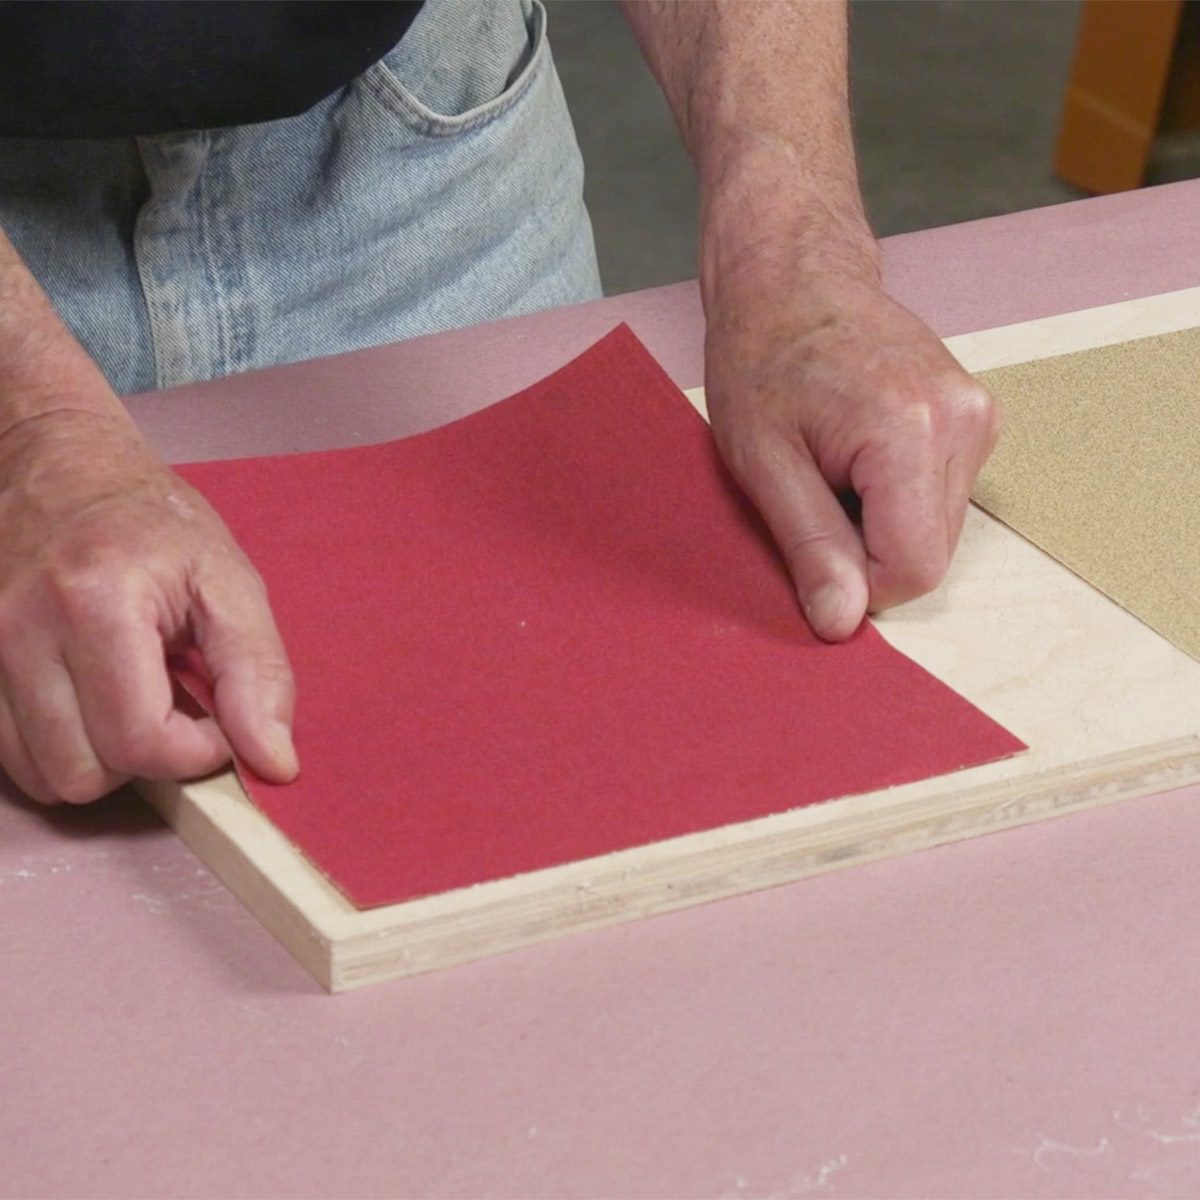
For the final sanding of a prize project, it’s hard to beat good old hand-sanding. When you put away the power sandersand carefully hand-sand with the grain—using finer and finer grits of sandpaper—you’ll produce a smooth surface to take pride in for years to come. To make your own “super hand sander,” glue a piece of computer mouse pad or other “closed-cell foam” to a wooden sanding block. This creates a firm yet giving base that gently increases sanding torque on flat surfaces and convex corners while ensuring a flat, scratch-free surface. Use a heavy coat of photo-mount spray adhesive or rubber cement to glue the mouse pad to the block. Apply adhesive-backed sandpaper to the block for the beginning sanding steps. Since extra-fine sandpaper isn’t widely available with adhesive backing, apply ordinary extra-fine paper to the block with a light coat of photo-mount spray.
Learn how to sand wood faster.

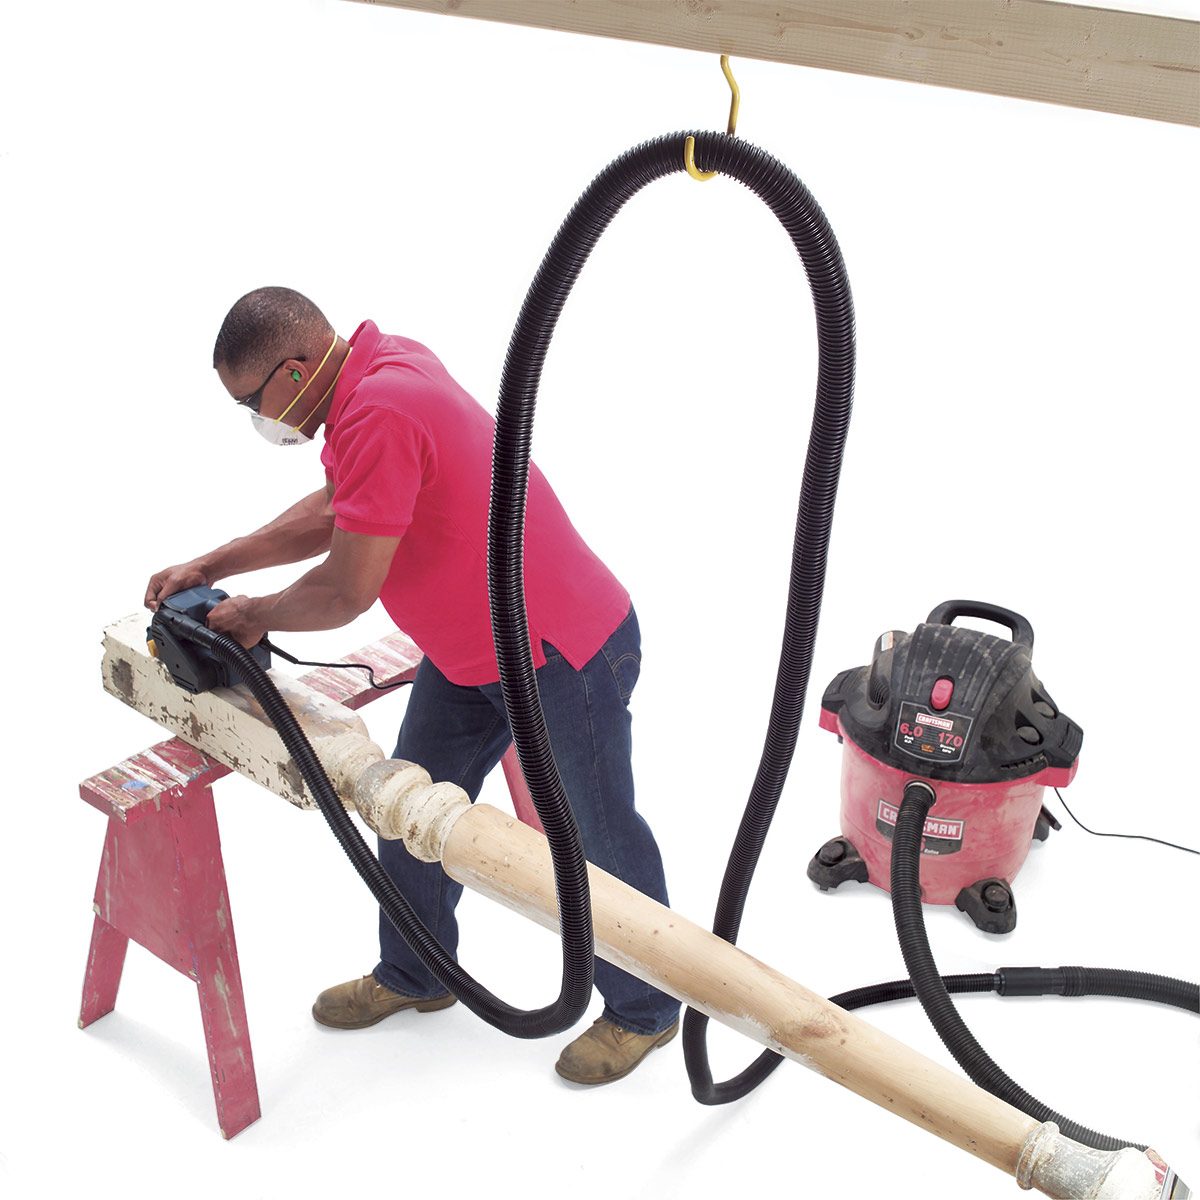
Raise Your Shop Vacuum to Your Benchtop
Tired of sawdust covering your workbench and woodworking tools? This adjustable vacuum hose holder attaches to the shop vacuum and can be rolled into position exactly where it’s needed for a drill sander. Learn how to build it.
Sanding Tips from Travis
Watch this video to learn some of Travis’ favorite sanding tips that make the job quicker and easier.